<?xml version="1.0" encoding="utf-8"?><feed xmlns="http://www.w3.org/2005/Atom" xml:lang="en"><generator uri="https://jekyllrb.com/" version="4.4.1">Jekyll</generator><link href="https://www.notesoncloudcomputing.com/feed.xml" rel="self" type="application/atom+xml" /><link href="https://www.notesoncloudcomputing.com/" rel="alternate" type="text/html" hreflang="en" /><updated>2026-03-15T00:07:03+01:00</updated><id>https://www.notesoncloudcomputing.com/feed.xml</id><title type="html">Notes on Cloud Computing</title><subtitle>A collection of curated opinions and code snippets on cloud tech &lt;br&gt;Bridging knowledge and implementation for enthusiasts and professionals alike</subtitle><author><name>Carles Loriente</name></author><entry><title type="html">Use Registry Bouncer to Stop NPM Supply Chain Attacks</title><link href="https://www.notesoncloudcomputing.com/posts/2026-03-04-registry-bouncer-github-action/" rel="alternate" type="text/html" title="Use Registry Bouncer to Stop NPM Supply Chain Attacks" /><published>2026-03-04T13:14:02+01:00</published><updated>2026-03-15T00:05:59+01:00</updated><id>https://www.notesoncloudcomputing.com/posts/registry-bouncer-github-action</id><content type="html" xml:base="https://www.notesoncloudcomputing.com/posts/2026-03-04-registry-bouncer-github-action/"><![CDATA[<h2 id="introducing-registry-bouncer-ready-for-your-cicd">Introducing Registry Bouncer, ready for your CI/CD</h2>

<p>If you read <a href="/posts/2026-02-27-anatomy-of-a-web3-supply-chain-attack/">my last post</a>, you know that I recently had my crypto wallet drained by a fake Polymarket copy-trading bot. The attackers used a supply chain attack, hiding malicious NPM packages deep inside the project by hijacking the <code class="language-plaintext highlighter-rouge">resolved</code> URL in the <code class="language-plaintext highlighter-rouge">package-lock.json</code> file.</p>

<p><img src="/assets/images/2026-03-04-registry-bouncer-github-action.webp" alt="Registry Bouncer" class="img-fluid" /></p>

<p>Writing the technical post-mortem was satisfying, but I knew I couldn’t just stop there.</p>

<p>Today, I am excited to announce the release of my new open-source security tool: <strong>Registry Bouncer</strong>, now live on the <a href="https://github.com/marketplace/actions/registry-bouncer" target="_blank">GitHub Actions Marketplace</a>!</p>

<h3 id="the-problem-npm-install-is-a-trap">The Problem: <code class="language-plaintext highlighter-rouge">npm install</code> is a Trap</h3>

<p>The core issue with these supply chain attacks is how CI/CD pipelines traditionally handle dependencies. Attackers use techniques like typo-squatting or dependency confusion to alter a project’s <code class="language-plaintext highlighter-rouge">package-lock.json</code>. They change the registry URL of a legitimate-looking package to point to their own malicious server.</p>

<p>If your GitHub Actions workflow simply runs <code class="language-plaintext highlighter-rouge">npm install</code> or <code class="language-plaintext highlighter-rouge">npm ci</code> to build the project, <strong>it is already too late</strong>. The malicious package is downloaded, and any malicious <code class="language-plaintext highlighter-rouge">postinstall</code> scripts are immediately executed on your CI runner with access to your environment variables.</p>

<p>We need a way to inspect the lockfile <em>before</em> any installation happens.</p>

<h3 id="the-solution-meet-registry-bouncer">The Solution: Meet Registry Bouncer</h3>

<p><strong>Registry Bouncer</strong> is a zero-configuration GitHub Action that stands at the gate of your repository and blocks malicious NPM packages from ever entering your codebase.</p>

<p>Instead of relying on complex vulnerability scanners that only look for <em>known</em> CVEs, Registry Bouncer takes a zero-trust approach to package registries.</p>

<h4 id="-key-features">✨ Key Features</h4>

<ul>
  <li><strong>Pre-Install Execution:</strong> It parses your <code class="language-plaintext highlighter-rouge">package-lock.json</code> natively without running <code class="language-plaintext highlighter-rouge">npm install</code>. Malicious scripts never get the chance to execute.</li>
  <li><strong>Strict Whitelisting:</strong> It extracts every <code class="language-plaintext highlighter-rouge">resolved</code> URL in your dependency tree and cross-references them against a strict list of trusted registries (like the official NPM registry, Yarn, and GitHub Packages).</li>
  <li><strong>Automated PR Blocking:</strong> If a rogue URL is detected (e.g., <code class="language-plaintext highlighter-rouge">https://scammer-domain.com/malware.tgz</code>), the Action immediately exits with a failure code, turning the CI check red and blocking the Pull Request from being merged.</li>
  <li><strong>Beautiful UI Reports:</strong> It generates a clean, detailed Markdown table directly in your GitHub Actions Job Summary showing exactly which packages failed the check.</li>
  <li><strong>Automated Security Advisories:</strong> If you enable the <code class="language-plaintext highlighter-rouge">create_pages_report</code> parameter, the Action will automatically generate and commit a Jekyll-formatted security advisory to your repository’s <code class="language-plaintext highlighter-rouge">_posts</code> directory to publish on GitHub Pages!</li>
</ul>

<h4 id="how-to-use-it">How to Use It</h4>

<p>Using Registry Bouncer is incredibly simple. You don’t need to configure any complex rules. Just drop this step into your existing GitHub Actions workflow (e.g., <code class="language-plaintext highlighter-rouge">.github/workflows/security.yml</code>):</p>

<div class="language-yaml highlighter-rouge"><pre class="highlight "><button type="button" class="btn-clipboard float-end tooltip" aria-label="Copy to clipboard" data-bs-original-title="Copy to clipboard"><span class="tooltiptext">Copy to clipboard</span><span class="clipboard filter-white"></span></button>
<code>name: Security Checks

on:
  push:
    branches: [ "main" ]
  pull_request:
    branches: [ "main" ]

jobs:
  scan-lockfile:
    name: Scan NPM Registries
    runs-on: ubuntu-latest
    steps:
      - name: Checkout Code
        uses: actions/checkout@v4

      - name: Run Registry Bouncer
        uses: carlesloriente/registry-bouncer@v1.1.0</code>
</pre></div>

<blockquote>
  <p>Make sure to check the Marketplace for the latest version tag!</p>
</blockquote>

<h3 id="check-the-demo">Check the Demo</h3>

<p>Want to see exactly how Registry Bouncer stops an attack in a real CI/CD pipeline?</p>

<p>I have set up a <a href="https://github.com/carlesloriente/polymarket-copy-bot-ts-registry-bouncer-demo/actions/runs/22665455058" target="_blank">Live Demo Repository</a>. This demo uses a recreated, defanged version of the original malicious Polymarket bot that inspired this tool. Head over to the <strong>Pull Requests</strong> or <strong>Actions</strong> tab in that repo to see Registry Bouncer catching the rogue <code class="language-plaintext highlighter-rouge">keccak256-helper</code> and <code class="language-plaintext highlighter-rouge">encrypt-layout-helper</code> dependencies, blocking the merge (if PR), and generating the automated report!</p>

<h3 id="securing-third-party-dependencies">Securing third-party dependencies</h3>

<p>Open source doesn’t always mean safe. We have to be vigilant about auditing our dependency trees.</p>

<p>I built Registry Bouncer to make that vigilance automatic. It is completely free and open-source. If you are building Node.js applications —whether they are crypto bots, enterprise backends, or simple side projects— I highly encourage you to add it to your CI/CD pipelines.</p>

<p>You can find the action on the <strong><a href="https://github.com/marketplace/actions/registry-bouncer" target="_blank">GitHub Marketplace here</a></strong>.</p>

<p>Stay safe out there, and let’s keep building!</p>

<p><em>If you found this tool helpful, please consider starring the <a href="https://github.com/carlesloriente/registry-bouncer" target="_blank">repository on GitHub</a> and <a href="https://github.com/sponsors/carlesloriente" target="_blank">sponsor</a> me for more security deep-dives and tools.</em></p>]]></content><author><name>Carles Loriente</name></author><category term="registry-bouncer" /><category term="github-action" /><category term="ci/cd" /><category term="security" /><category term="registry-bouncer" /><category term="github-action" /><category term="ci/cd" /><category term="security" /><summary type="html"><![CDATA[Registry Bouncer is a zero-configuration GitHub Action that stands at the gate of your repository and blocks malicious NPM packages from ever entering your codebase.]]></summary></entry><entry><title type="html">Anatomy of a Web3 Supply Chain Attack</title><link href="https://www.notesoncloudcomputing.com/posts/2026-02-27-anatomy-of-a-web3-supply-chain-attack/" rel="alternate" type="text/html" title="Anatomy of a Web3 Supply Chain Attack" /><published>2026-02-27T15:51:02+01:00</published><updated>2026-03-15T00:05:59+01:00</updated><id>https://www.notesoncloudcomputing.com/posts/anatomy-of-a-web3-supply-chain-attack</id><content type="html" xml:base="https://www.notesoncloudcomputing.com/posts/2026-02-27-anatomy-of-a-web3-supply-chain-attack/"><![CDATA[<h2 id="how-a-fake-polymarket-bot-drained-my-wallet">How a Fake Polymarket Bot Drained My Wallet</h2>

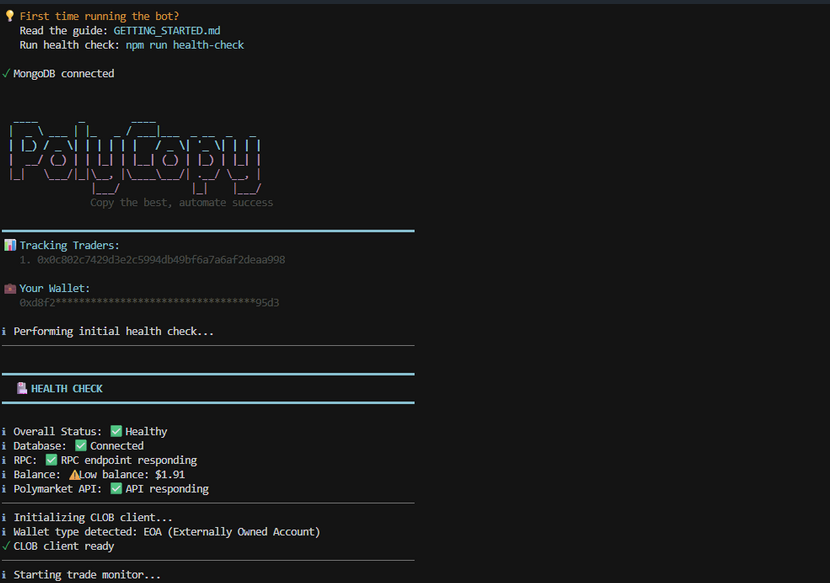
<p>Last week, I decided I wanted to learn more about Polymarket copy trading bots. Like many of us do, I headed over to GitHub and found a repository called <code class="language-plaintext highlighter-rouge">polymarket-copy-bot-ts</code> that looked promising. It had over 800 stars, 600 forks, and a slick, well-done README. I downloaded it, built it, look briefly at the code and configured all the required settings and parameters—including my wallet credentials (address and private key) in a <code class="language-plaintext highlighter-rouge">.env</code> file—and fired it up. At first glance, everything was looking good.</p>

<p><img src="/assets/images/2026-02-27-anatomy-of-a-web3-supply-chain-attack/bot.png" alt="Bot running" class="img-fluid" /></p>

<p>A few hours later, I checked my balance. All my open positions were closed, and my funds from my Polymarket wallet were stolen. Drained completely.</p>

<p>It’s an incredibly frustrating experience, but as a security champion, I knew I couldn’t just walk away. I decided to dig into the source code, figure out exactly <em>how</em> and <em>when</em> they did it, and write this post to warn potential new users. Here is the step-by-step technical breakdown of how this Web3 supply chain attack works, and how I finally caught the malware in the act.</p>

<h3 id="1-initial-triage-hunting-for-the-trap">1. Initial Triage: Hunting for the Trap</h3>

<p>My first instinct was to check the root directory of the bot. I immediately found a massive red flag: a file named <code class="language-plaintext highlighter-rouge">audit_algorithm.sh</code>.</p>

<p>Why would a standard Node.js TypeScript trading bot include a standalone bash script? It shouldn’t.</p>


<p>When you follow the bot’s setup instructions and run <code class="language-plaintext highlighter-rouge">npm run build</code> or <code class="language-plaintext highlighter-rouge">npm run health-check</code>, the attacker uses <code class="language-plaintext highlighter-rouge">package.json</code> hooks to silently execute this shell script in the background. But that wasn’t the only trap. The real devastating payload was hiding in the NPM dependencies.</p>

<p><img src="/assets/images/2026-02-27-anatomy-of-a-web3-supply-chain-attack/source-code-repo.webp" alt="Repo source code" class="img-fluid" /></p>

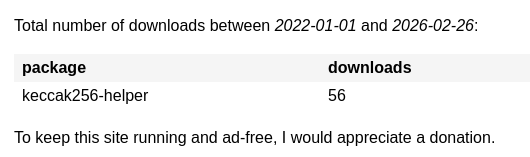
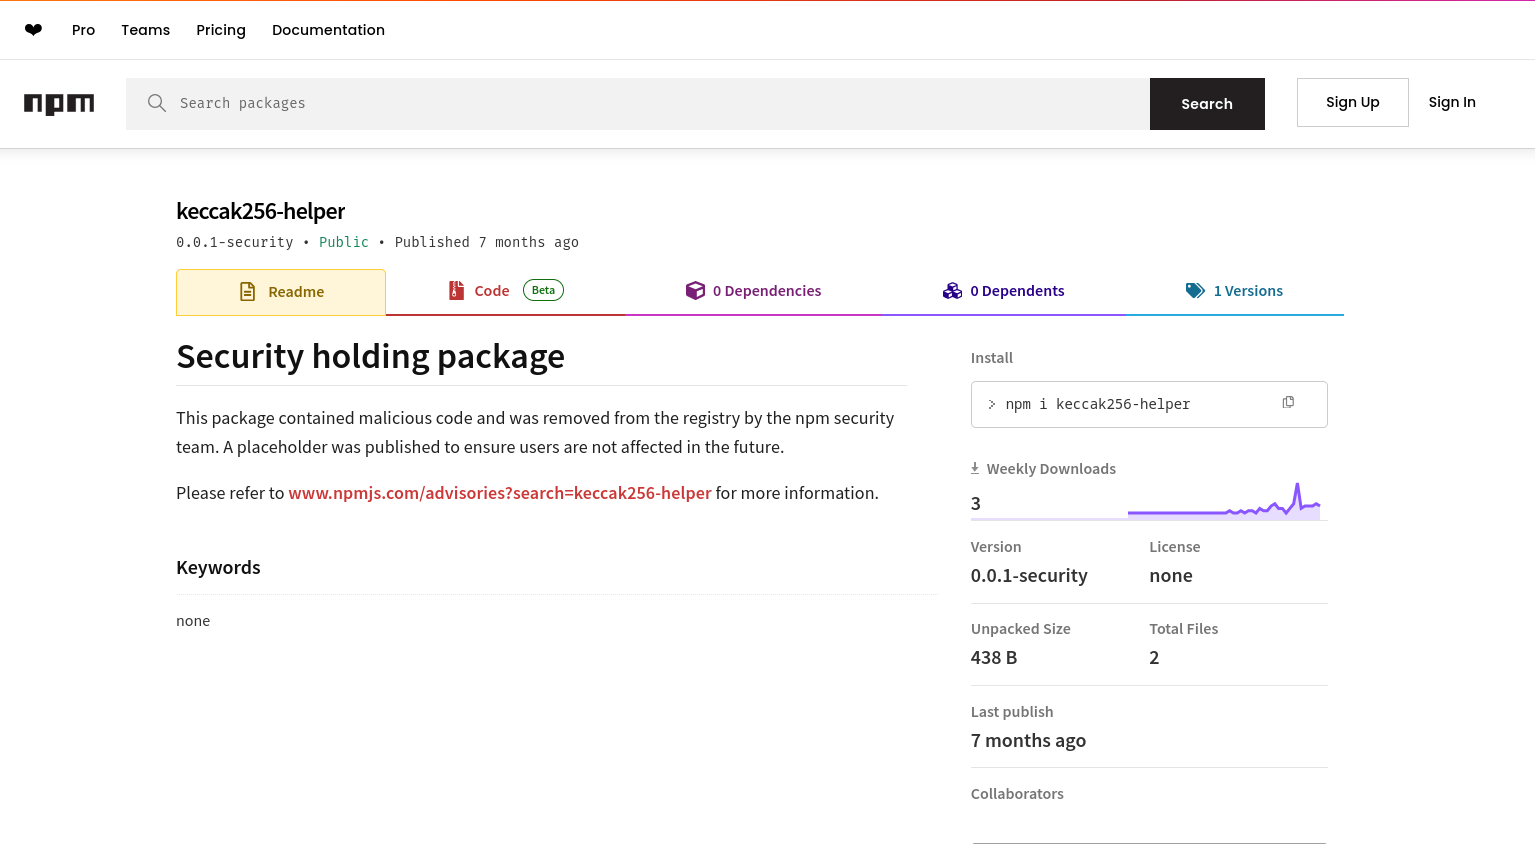
<p>I started auditing the <code class="language-plaintext highlighter-rouge">package.json</code> and noticed an obscure package called <code class="language-plaintext highlighter-rouge">keccak256-helper</code>. I then went straight to the <code class="language-plaintext highlighter-rouge">package-lock.json</code> file to investigate further and found something deeply concerning: the package’s <code class="language-plaintext highlighter-rouge">resolved</code> URL pointed to a suspicious domain. This meant the package wasn’t even being downloaded or distributed by the official NPM registry! However, it had been published there for a short period, being downloaded at least 56 times.</p>

<p><img src="/assets/images/2026-02-27-anatomy-of-a-web3-supply-chain-attack/package-downloads.png" alt="Repo source code" class="img-fluid" /></p>

<p>Until the registry’s automated security tools banned it.</p>

<p><img src="/assets/images/2026-02-27-anatomy-of-a-web3-supply-chain-attack/npm-registry.png" alt="NPM registry package banned" class="img-fluid" /></p>

<h3 id="2-the-lure-social-engineering--impersonation">2. The Lure (Social Engineering &amp; Impersonation)</h3>

<p>Attackers know that Web3 developers use <code class="language-plaintext highlighter-rouge">keccak256</code> (a popular hashing algorithm) all the time. The attacker published a malicious package named <code class="language-plaintext highlighter-rouge">keccak256-helper</code> to blend in.</p>

<p>If you look at the package’s <code class="language-plaintext highlighter-rouge">README.md</code> and <code class="language-plaintext highlighter-rouge">package.json</code>, it looks completely legitimate:</p>

<div class="language-json highlighter-rouge"><pre class="highlight "><button type="button" class="btn-clipboard float-end tooltip" aria-label="Copy to clipboard" data-bs-original-title="Copy to clipboard"><span class="tooltiptext">Copy to clipboard</span><span class="clipboard filter-white"></span></button>
<code>{
  "name": "keccak256-helper",
  "version": "1.3.2",
  "description": "Tools for secure encryption and format validation",
  "main": "index.js",
  "types": "index.d.ts",
  "author": "rabby",
  "license": "MIT"
}</code>
</pre></div>

<p>They even included an <code class="language-plaintext highlighter-rouge">index.d.ts</code> file exporting a fake <code class="language-plaintext highlighter-rouge">initializeSession(key: any)</code> function so that TypeScript compilers wouldn’t throw any errors during development!</p>

<h3 id="3-evading-detection-obfuscation">3. Evading Detection (Obfuscation)</h3>

<p>When I opened the actual <code class="language-plaintext highlighter-rouge">index.js</code> file of the package, it was a total mess. It was an unreadable wall of mathematical operations and arrays.</p>

<p>The attacker used a heavy obfuscation technique called <strong>Control Flow Flattening</strong>. Instead of code running logically from top to bottom, the execution is scrambled into massive, infinite-looking <code class="language-plaintext highlighter-rouge">while</code> loops containing <code class="language-plaintext highlighter-rouge">switch</code> statements (e.g., <code class="language-plaintext highlighter-rouge">while(e+P+d+h!=43)H:switch...</code>).</p>

<p>This is deliberately done to confuse human analysts and bypass automated static antivirus scanners that look for known malicious code signatures. But if you look closely, you can spot it checking <code class="language-plaintext highlighter-rouge">process.argv.slice(2)</code> for execution flags like <code class="language-plaintext highlighter-rouge">--version</code> or <code class="language-plaintext highlighter-rouge">-v</code>. If it detects it’s running in an automated security sandbox, it halts entirely to stay hidden.</p>

<h3 id="4-the-malicious-payload-extracting-the-secrets">4. The Malicious Payload: Extracting the Secrets</h3>

<p>Once the malware confirms it’s running in a real environment, the true payload activates and aggressively hunts for your keys.</p>

<p>Instead of the traditional attack vectors used by older trading bots in the past, my analysis showed that this malware directly reads <code class="language-plaintext highlighter-rouge">.env</code> variables, parses <code class="language-plaintext highlighter-rouge">process.env.PRIVATE_KEY</code>, and sends the stolen data as a payload via an HTTP POST request to a remote server.</p>

<p>To execute this, the attacker invokes the malicious function (carefully hidden with excessive spacing in the bot’s source files) silently like this:</p>

<div class="language-js highlighter-rouge"><pre class="highlight "><button type="button" class="btn-clipboard float-end tooltip" aria-label="Copy to clipboard" data-bs-original-title="Copy to clipboard"><span class="tooltiptext">Copy to clipboard</span><span class="clipboard filter-white"></span></button>
<code>try {
  require('keccak256-helper').initializeSession(PRIVATE_KEY);
} catch (_) {}</code>
</pre></div>

<p>Because of the <code class="language-plaintext highlighter-rouge">try/catch</code> block, if the malware crashes (for example, if <code class="language-plaintext highlighter-rouge">window</code> is undefined in a pure Node environment, or if the network request fails), the error is swallowed entirely. You would never even know the exfiltration attempt happened until your funds were already gone.</p>

<h3 id="5-dynamic-analysis-catching-the-thief">5. Dynamic Analysis: Catching the Thief</h3>

<p>I wanted to deobfuscate the HTTP server address where my credentials were sent. Because the strings were heavily encrypted at runtime, static analysis wasn’t enough. I had to use <strong>Dynamic Analysis</strong>—tricking the malware into decrypting the URL itself and intercepting it right before it sent the data.</p>

<p>I wrote an interceptor script (<code class="language-plaintext highlighter-rouge">analyzer.js</code>) to mock the browser environment and hook into Node’s native <code class="language-plaintext highlighter-rouge">http</code> and <code class="language-plaintext highlighter-rouge">https</code> modules. At first, I was getting a weird error (<code class="language-plaintext highlighter-rouge">throw new Error('Blocked')</code>), and no URLs were printing. The hacker was actually overriding <code class="language-plaintext highlighter-rouge">console.log</code> inside their obfuscated script to blind me!</p>

<p>To beat this, I updated my script to write the intercepted HTTP request directly to a file on my disk before intentionally crashing the process to prevent the data from escaping:</p>

<div class="language-js highlighter-rouge"><pre class="highlight "><button type="button" class="btn-clipboard float-end tooltip" aria-label="Copy to clipboard" data-bs-original-title="Copy to clipboard"><span class="tooltiptext">Copy to clipboard</span><span class="clipboard filter-white"></span></button>
<code>// A snippet of my final dynamic analysis script
https.request = function(...args) {
    const targetUrl = parseRequestTarget(args);
    const options = JSON.stringify(args[0], null, 2);

    // Write the stolen URL directly to a file to bypass console.log manipulation!
    const output = `[🚨 HTTPS INTERCEPT 🚨]\nTarget URL: ${targetUrl}\nOptions: ${options}\n`;
    fs.writeFileSync('./exfiltration_data.txt', output, 'utf8');

    throw new Error('Successfully blocked HTTPS exfiltration');
};</code>
</pre></div>

<p>By feeding the script a fake <code class="language-plaintext highlighter-rouge">DUMMY_PRIVATE_KEY_DEADBEEF</code>, I finally forced the malware to reveal its Command and Control (C2) server inside my <code class="language-plaintext highlighter-rouge">exfiltration_data.txt</code> file!</p>

<h3 id="6-indicators-of-compromise-iocs">6. Indicators of Compromise (IoCs)</h3>

<p>If you have downloaded any Web3 bots recently, check your repositories for these:</p>

<ul>
  <li>
    <p><strong>Malicious NPM Package:</strong> <code class="language-plaintext highlighter-rouge">keccak256-helper</code> (Version: 1.3.2)</p>
  </li>
  <li>
    <p><strong>Malicious GitHub Repo:</strong> <code class="language-plaintext highlighter-rouge">polymarket-copy-bot-ts</code></p>
  </li>
  <li>
    <p><strong>Suspicious Files:</strong> <code class="language-plaintext highlighter-rouge">audit_algorithm.sh</code></p>
  </li>
  <li>
    <p><strong>Suspicious Functions:</strong> Hidden in the code with a ton of spacing</p>
  </li>
</ul>

<h3 id="7-lessons-learned">7. Lessons Learned</h3>

<ol>
  <li>
    <p><strong>Never use your primary wallet.</strong> If you want to test a new crypto bot, use a burner wallet with only the absolute minimum funds required (just enough for gas).</p>
  </li>
  <li>
    <p><strong>Beware of GitHub “Star Farming”.</strong> The repo that got me had 871 Stars and 635 Forks, but only 35 Watchers and 7 Issues without any PRs. This is the classic footprint of a bot-farmed repository meant to create fake trust.</p>
  </li>
  <li>
    <p><strong>Open Source doesn’t always mean safe.</strong> Just because you can read the source code files doesn’t mean there aren’t malicious dependencies lurking in the <code class="language-plaintext highlighter-rouge">package.json</code>, <code class="language-plaintext highlighter-rouge">package-lock.json</code>, or shell scripts waiting to trigger on the execution of code.</p>
  </li>
</ol>


<p><img src="/assets/images/2026-02-27-anatomy-of-a-web3-supply-chain-attack/github-profile.webp" alt="Fake Github profile" class="img-fluid" /></p>

<p>Be careful! There is currently a ton of these fake Polymarket/crypto trading bots flooding GitHub. Always audit your dependencies, and never hand over your private keys.</p>

<p><em>If you found this breakdown helpful, feel free to share it to warn others, and <a href="https://github.com/sponsors/carlesloriente" target="_blank">sponsor</a> me for more security deep-dives and tools.</em></p>

<h3 id="kudos-to-github-trust--safety-team">Kudos to GitHub Trust &amp; Safety team</h3>

<p><strong>P.S.</strong> After compiling these findings, I immediately reported the repository and the malicious user account to GitHub’s Trust &amp; Safety team. I’m happy to report that a few hours later, they took action and deleted the entire repository and the scammer’s account from the platform. While my funds are unfortunately gone, at least this specific trap has been dismantled and can’t harm anyone else!</p>]]></content><author><name>Carles Loriente</name></author><category term="polymarket" /><category term="chain-attack" /><category term="trading-bot" /><category term="wallet" /><category term="polymarket-copy-bot-ts" /><category term="polymarket" /><category term="chain-attack" /><category term="trading-bot" /><category term="polymarket-copy-bot-ts" /><category term="wallet" /><summary type="html"><![CDATA[How a Fake Polymarket Bot Drained My Wallet]]></summary></entry><entry><title type="html">How to install Ladybird on Fedora</title><link href="https://www.notesoncloudcomputing.com/posts/2025-03-07-how-to-install-ladybird-on-fedora/" rel="alternate" type="text/html" title="How to install Ladybird on Fedora" /><published>2025-03-07T20:51:02+01:00</published><updated>2026-03-15T00:05:59+01:00</updated><id>https://www.notesoncloudcomputing.com/posts/how-to-install-ladybird-on-fedora</id><content type="html" xml:base="https://www.notesoncloudcomputing.com/posts/2025-03-07-how-to-install-ladybird-on-fedora/"><![CDATA[<h2 id="why-use-ladybird-browser">Why use Ladybird browser?</h2>

<p><a href="https://ladybird.org/" target="_blank">Ladybird</a> is a web browser that is designed to be fast and lightweight. It is built on top of the Chromium browser engine, which means that it is compatible with all of the latest web technologies. Ladybird is designed to be easy to use and to provide a clean and simple user interface.</p>

<p><img src="/assets/images/2025-03-07-how-to-install-ladybird-on-fedora-1.png" alt="Ladybird logo" class="img-fluid" /></p>

<p><a href="https://awesomekling.github.io/" target="_blank">Andreas Kling</a> the creator of <a href="https://ladybird.org/" target="_blank">Ladybird</a>, is also the creator of the <a href="https://serenityos.org/" target="_blank">SerenityOS</a>.</p>

<h2 id="download-and-install-on-fedora">Download and Install on Fedora</h2>

<p>Ladybird it’s on development, so you can download the latest version from the <a href="https://github.com/LadybirdBrowser/ladybird" target="_blank">official GitHub repo</a>.</p>

<p>Feel free to clone the repository or download the full source code as a <a href="https://github.com/LadybirdBrowser/ladybird/archive/refs/heads/master.zip" target="_blank">zip file</a>.</p>

<h3 id="dependencies">Dependencies</h3>

<div class="language-bash highlighter-rouge"><pre class="highlight "><button type="button" class="btn-clipboard float-end tooltip" aria-label="Copy to clipboard" data-bs-original-title="Copy to clipboard"><span class="tooltiptext">Copy to clipboard</span><span class="clipboard filter-white"></span></button>
<code>sudo dnf install autoconf-archive automake ccache cmake curl liberation-sans-fonts libglvnd-devel nasm ninja-build perl-FindBin perl-IPC-Cmd perl-lib qt6-qtbase-devel qt6-qtmultimedia-devel qt6-qttools-devel qt6-qtwayland-devel tar unzip zip zlib-ng-compat-static</code>
</pre></div>

<blockquote class="alert alert-info">
  <p><strong>ⓘ</strong> These are the dependencies required to build Ladybird from source</p>
</blockquote>

<h3 id="build-ladybird">Build Ladybird</h3>

<ol>
  <li>Open a terminal window.</li>
  <li>Navigate to the directory where you downloaded the Ladybird package.</li>
  <li>Run the following command to install Ladybird:</li>
</ol>

<div class="language-bash highlighter-rouge"><pre class="highlight "><button type="button" class="btn-clipboard float-end tooltip" aria-label="Copy to clipboard" data-bs-original-title="Copy to clipboard"><span class="tooltiptext">Copy to clipboard</span><span class="clipboard filter-white"></span></button>
<code>sh Meta/ladybird.sh install</code>
</pre></div>

<p>Copy the <code class="language-plaintext highlighter-rouge">Ladybird</code> binary to a directory in your <code class="language-plaintext highlighter-rouge">PATH</code>:</p>
<div class="language-bash highlighter-rouge"><pre class="highlight "><button type="button" class="btn-clipboard float-end tooltip" aria-label="Copy to clipboard" data-bs-original-title="Copy to clipboard"><span class="tooltiptext">Copy to clipboard</span><span class="clipboard filter-white"></span></button>
<code>sudo cp Build/release/bin/Ladybird /usr/local/bin</code>
</pre></div>

<h3 id="run-ladybird">Run Ladybird</h3>

<p>You can now run Ladybird like an standard application or by typing <code class="language-plaintext highlighter-rouge">ladybird</code> in a terminal window.</p>
<div class="language-bash highlighter-rouge"><pre class="highlight "><button type="button" class="btn-clipboard float-end tooltip" aria-label="Copy to clipboard" data-bs-original-title="Copy to clipboard"><span class="tooltiptext">Copy to clipboard</span><span class="clipboard filter-white"></span></button>
<code>Ladybird</code>
</pre></div>

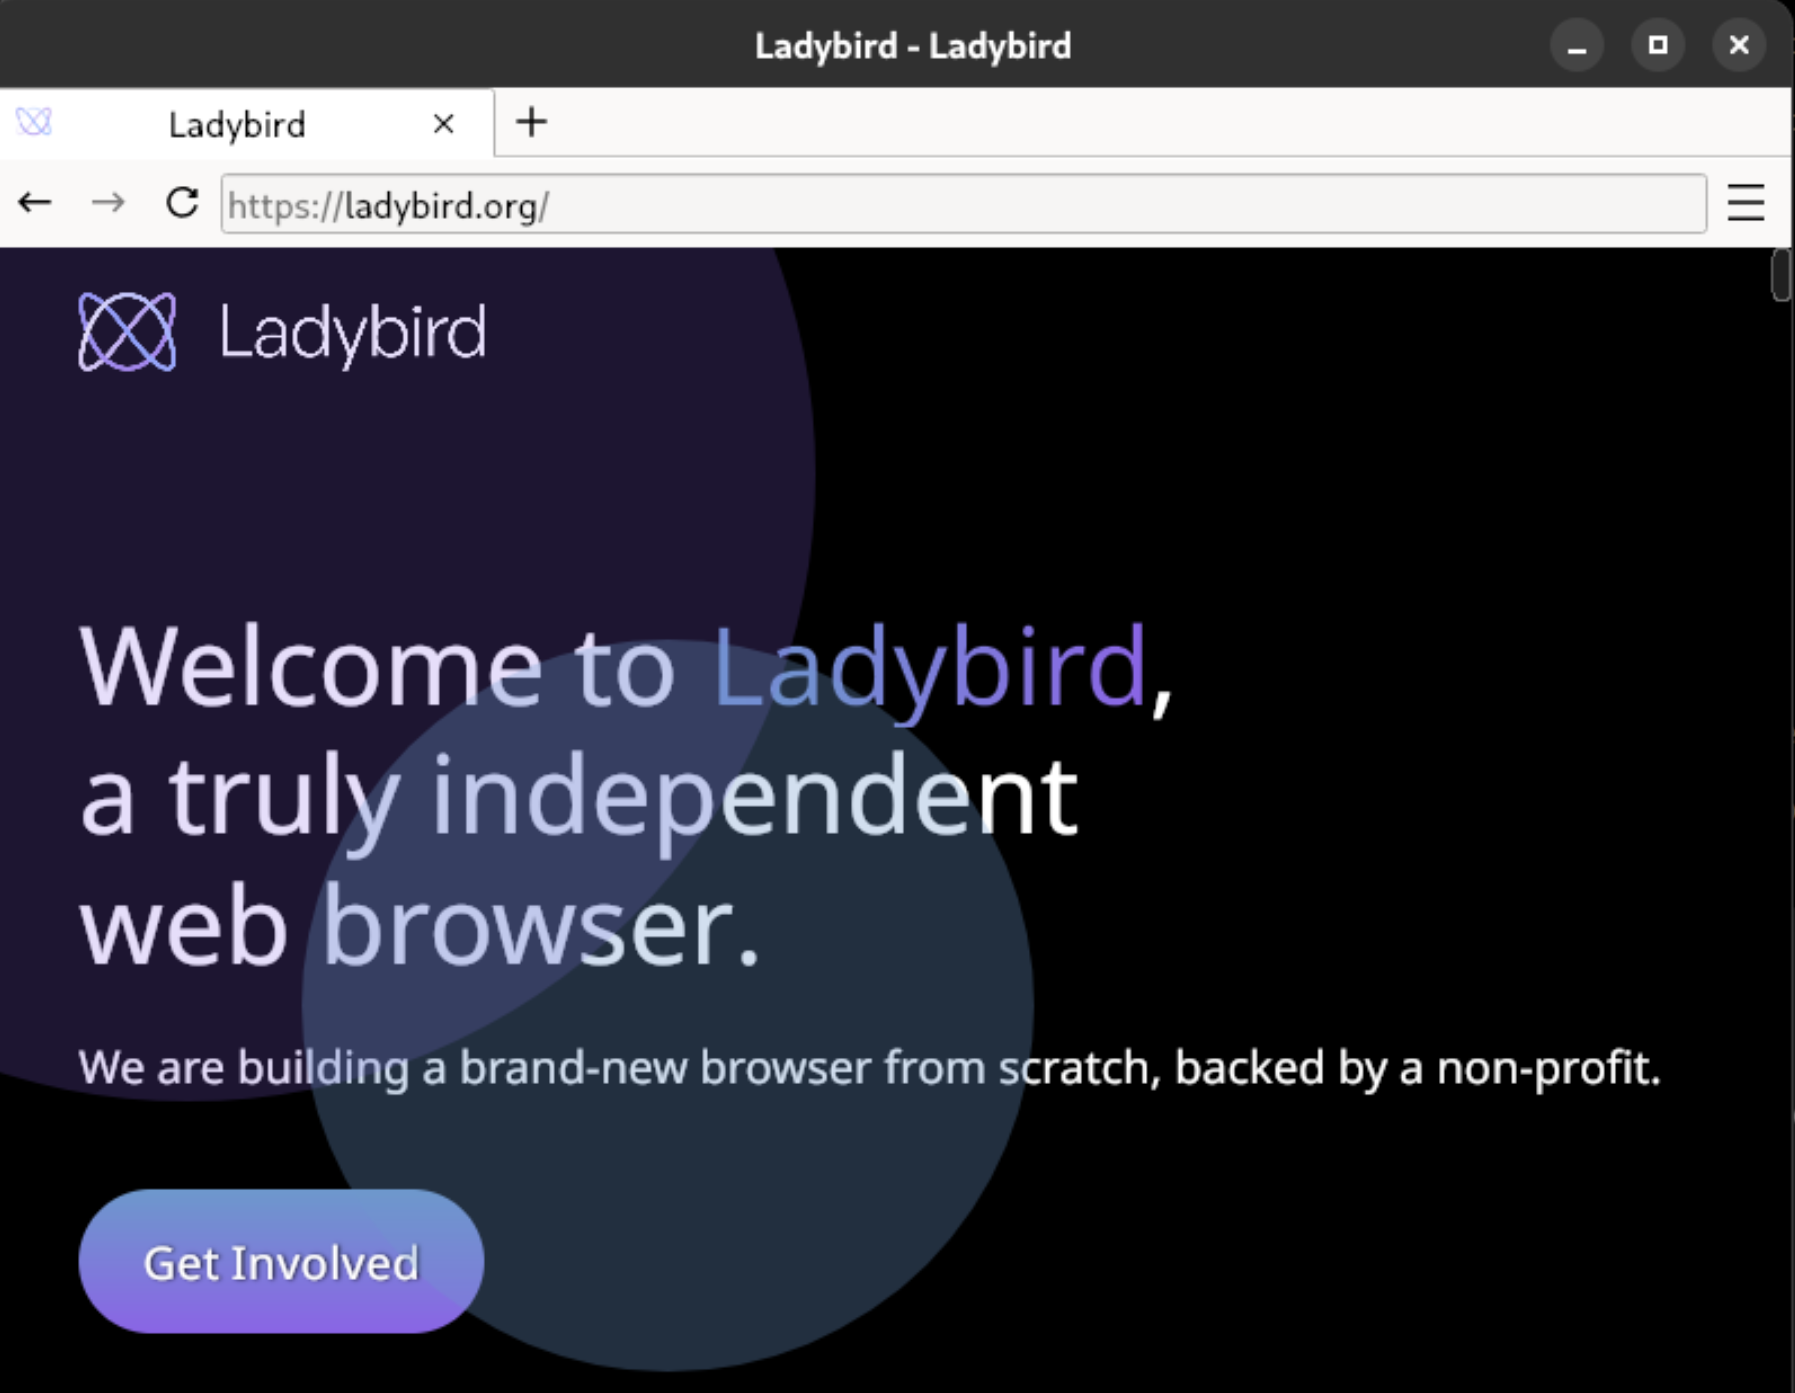
<p><img src="/assets/images/2025-03-07-how-to-install-ladybird-on-fedora-2.png" alt="Ladybird browser" class="img-fluid" /></p>

<h3 id="troubleshooting">Troubleshooting</h3>

<p>If you encounter any errors during the build process, you can run the following command to clean up the build directory and start over:</p>
<div class="language-bash highlighter-rouge"><pre class="highlight "><button type="button" class="btn-clipboard float-end tooltip" aria-label="Copy to clipboard" data-bs-original-title="Copy to clipboard"><span class="tooltiptext">Copy to clipboard</span><span class="clipboard filter-white"></span></button>
<code>sh Meta/ladybird.sh clean</code>
</pre></div>

<blockquote class="alert alert-info">
  <p><strong>ⓘ</strong> Check the <a href="https://github.com/LadybirdBrowser/ladybird?tab=readme-ov-file" target="_blank">official Ladybird documentation</a> for more information</p>
</blockquote>

<h2 id="conclusion">Conclusion</h2>

<p>Ladybird it’s on development, so you can expect some bugs and missing features. But it’s a good alternative to the mainstream browsers, and it’s worth to give it a try.</p>

<p>Consider supporting the Ladybird project donating on <a href="https://donorbox.org/ladybird" target="_blank">donorbox</a>. Donors can also contribute to the development of the browser.</p>

<p><em>If you have any questions or suggestions, feel free to leave a comment below, and <a href="https://github.com/sponsors/carlesloriente" target="_blank">sponsor</a> me for more security deep-dives and tools.</em></p>]]></content><author><name>Carles Loriente</name></author><category term="ladybird" /><category term="fedora" /><category term="ladybird" /><category term="fedora" /><category term="installation" /><summary type="html"><![CDATA[A step-by-step guide on how to install and run Ladybird on Fedora.]]></summary></entry><entry><title type="html">Fixing error libruby.so.3.2: cannot open shared object file: No such file or directory</title><link href="https://www.notesoncloudcomputing.com/posts/2025-02-26-fixing-error-librubyso-3-2/" rel="alternate" type="text/html" title="Fixing error libruby.so.3.2: cannot open shared object file: No such file or directory" /><published>2025-02-26T20:11:02+01:00</published><updated>2026-03-15T00:05:59+01:00</updated><id>https://www.notesoncloudcomputing.com/posts/fixing-error-librubyso.3.2</id><content type="html" xml:base="https://www.notesoncloudcomputing.com/posts/2025-02-26-fixing-error-librubyso-3-2/"><![CDATA[<h2 id="librubyso32-cannot-open-shared-object-file-no-such-file-or-directory">libruby.so.3.2: cannot open shared object file: No such file or directory</h2>

<p>This error message indicates that the <code class="language-plaintext highlighter-rouge">libruby.so.3.2</code> shared object file is missing or inaccessible. This file is a crucial component of the Ruby runtime, responsible for providing core Ruby functionalities. When this file is missing, any Ruby command, including <code class="language-plaintext highlighter-rouge">gem</code> and applications like Jekyll, will fail. This issue typically arises from a broken or incomplete Ruby installation, a misconfigured Ruby environment, or when switching between Ruby versions.</p>

<p>This guide will walk you through the steps to resolve this error on various operating systems.</p>

<h2 id="reinstalling-ruby">Reinstalling Ruby</h2>

<p>The most common solution is to reinstall Ruby.I recommend to use a version manager like rbenv or rvm. Alternatively, you can reinstall Ruby directly from your operating system’s package manager.</p>

<h3 id="ubuntudebian">Ubuntu/Debian</h3>

<div class="language-bash highlighter-rouge"><pre class="highlight "><button type="button" class="btn-clipboard float-end tooltip" aria-label="Copy to clipboard" data-bs-original-title="Copy to clipboard"><span class="tooltiptext">Copy to clipboard</span><span class="clipboard filter-white"></span></button>
<code>sudo apt update
sudo apt-get install ruby-full</code>
</pre></div>

<blockquote class="alert alert-info">
  <p><strong>ⓘ</strong> <em>ruby-full</em> provides a comprehensive Ruby installation. For install a specific Ruby version use rbenv or rvm.</p>
</blockquote>

<h3 id="fedoracentos">Fedora/CentOS</h3>

<div class="language-bash highlighter-rouge"><pre class="highlight "><button type="button" class="btn-clipboard float-end tooltip" aria-label="Copy to clipboard" data-bs-original-title="Copy to clipboard"><span class="tooltiptext">Copy to clipboard</span><span class="clipboard filter-white"></span></button>
<code>sudo dnf install ruby-build ruby-build-rbenv ruby-devel
rbenv --version # Check rbenv installation</code>
</pre></div>

<blockquote class="alert alert-info">
  <p><strong>ⓘ</strong> <em>ruby-build</em> and <em>rbenv</em> are installed for managing multiple Ruby versions. The package <em>ruby-devel</em> provides the development headers.</p>
</blockquote>

<h3 id="windows">Windows</h3>

<ol>
  <li>Download the RubyInstaller from the official <a href="https://rubyinstaller.org/downloads/">RubyInstaller website</a>.</li>
  <li>Ensure you download the installer that includes DevKit. The DevKit is essential for compiling native extensions.</li>
  <li>Follow the installer’s instructions.</li>
</ol>

<h3 id="macos">macOS</h3>

<p>Homebrew is required, if missing, please install it:</p>
<div class="language-bash highlighter-rouge"><pre class="highlight "><button type="button" class="btn-clipboard float-end tooltip" aria-label="Copy to clipboard" data-bs-original-title="Copy to clipboard"><span class="tooltiptext">Copy to clipboard</span><span class="clipboard filter-white"></span></button>
<code>/bin/bash -c "$(curl -fsSL https://raw.githubusercontent.com/Homebrew/install/master/install.sh)"</code>
</pre></div>

<p>Install Ruby stuff:</p>
<div class="language-bash highlighter-rouge"><pre class="highlight "><button type="button" class="btn-clipboard float-end tooltip" aria-label="Copy to clipboard" data-bs-original-title="Copy to clipboard"><span class="tooltiptext">Copy to clipboard</span><span class="clipboard filter-white"></span></button>
<code>brew update
brew install rbenv ruby-build
rbenv install 3.2 # Install Ruby version 3.2 using rbenv and set as default
rbenv versions # Check if install was successful
rbenv global 3.2
rbenv rehash # Update rbenv shims
echo &lsquo;eval &quot;$(rbenv init -)&quot;&rsquo; &gt;&gt; ~/.zshrc source ~/.zshrc # Add rbenv to your shell configuration</code>
</pre></div>

<blockquote class="alert alert-info">
  <p><strong>ⓘ</strong> The ZSH shell installation is optional and only needed if you use Oh My Zsh.</p>
</blockquote>

<ul>
  <li><em>rbenv rehash</em> updates rbenv’s shims, which are used to find and execute Ruby executables.</li>
  <li>Adding eval <em>”$(rbenv init -)”</em> to your shell configuration ensures rbenv is initialized when you open a new terminal.</li>
</ul>

<h2 id="dependencies">Dependencies</h2>

<div class="language-bash highlighter-rouge"><pre class="highlight "><button type="button" class="btn-clipboard float-end tooltip" aria-label="Copy to clipboard" data-bs-original-title="Copy to clipboard"><span class="tooltiptext">Copy to clipboard</span><span class="clipboard filter-white"></span></button>
<code>gem install ffi</code>
</pre></div>
<p>The FFI (Foreign Function Interface) gem allows Ruby to interact with native libraries. It’s often required by other gems.</p>

<ul>
  <li>If you encounter issues installing the ffi gem, you may need to install the build-essential package (on Debian-based systems) or the equivalent for your operating system.</li>
</ul>

<div class="language-bash highlighter-rouge"><pre class="highlight "><button type="button" class="btn-clipboard float-end tooltip" aria-label="Copy to clipboard" data-bs-original-title="Copy to clipboard"><span class="tooltiptext">Copy to clipboard</span><span class="clipboard filter-white"></span></button>
<code>gem install bundler
bundle update</code>
</pre></div>
<p>Bundler manages gem dependencies. <code class="language-plaintext highlighter-rouge">bundle update</code> updates all gems listed in your <code class="language-plaintext highlighter-rouge">Gemfile</code> to their latest compatible versions. If you do not have a Gemfile, bundle update will have no effect:</p>

<h2 id="check-ruby-installation">Check Ruby installation</h2>

<p>Ensure that the correct version of Ruby is being used.</p>
<div class="language-bash highlighter-rouge"><pre class="highlight "><button type="button" class="btn-clipboard float-end tooltip" aria-label="Copy to clipboard" data-bs-original-title="Copy to clipboard"><span class="tooltiptext">Copy to clipboard</span><span class="clipboard filter-white"></span></button>
<code>ruby -v # Verify the active Ruby version
which ruby # Show which Ruby binary is being used</code>
</pre></div>

<p>After these steps, you should be able to run Ruby commands without issues.</p>

<p>Try running the command that initially produced the error. For example, if you encountered the error while running Jekyll, execute <code class="language-plaintext highlighter-rouge">jekyll serve</code>.</p>

<h2 id="troubleshooting">Troubleshooting</h2>

<ul>
  <li>Same error after reinstalling Ruby, double-check your shell configuration files for any conflicting Ruby paths.</li>
  <li>If using a version manager, ensure that the correct Ruby version is selected.</li>
  <li>If gem install commands are failing due to network problems, verify internet connectivity.</li>
  <li>If you have recently updated your operating system, try reinstalling ruby.</li>
</ul>]]></content><author><name>Carles Loriente</name></author><category term="ruby" /><category term="libruby" /><category term="fix-installation" /><category term="ruby" /><category term="libruby" /><category term="fix-installation" /><summary type="html"><![CDATA[How to fix a missing or misconfigured Ruby Installation..]]></summary></entry><entry><title type="html">Make your GitHub Profile shine with dynamic updates</title><link href="https://www.notesoncloudcomputing.com/posts/2025-01-26-make-a-dynamic-github-profile-with-github-actions/" rel="alternate" type="text/html" title="Make your GitHub Profile shine with dynamic updates" /><published>2025-01-25T23:11:02+01:00</published><updated>2026-03-15T00:05:59+01:00</updated><id>https://www.notesoncloudcomputing.com/posts/make-a-dynamic-github-profile-with-github-actions</id><content type="html" xml:base="https://www.notesoncloudcomputing.com/posts/2025-01-26-make-a-dynamic-github-profile-with-github-actions/"><![CDATA[<h2 id="github-profile-automation-level-up-your-game-with-github-actions">GitHub Profile Automation: Level Up Your Game with GitHub Actions</h2>

<h3 id="introduction">Introduction</h3>

<p>Your GitHub profile is your digital resume. It showcases your skills, projects, and contributions to the community. However, keeping it up-to-date can be time-consuming and often leads to outdated information. Using GitHub Actions, you can automate the display of your latest contributions, project statistics, blog articles and more. Keeping your profile fresh and relevant with automated updates.</p>

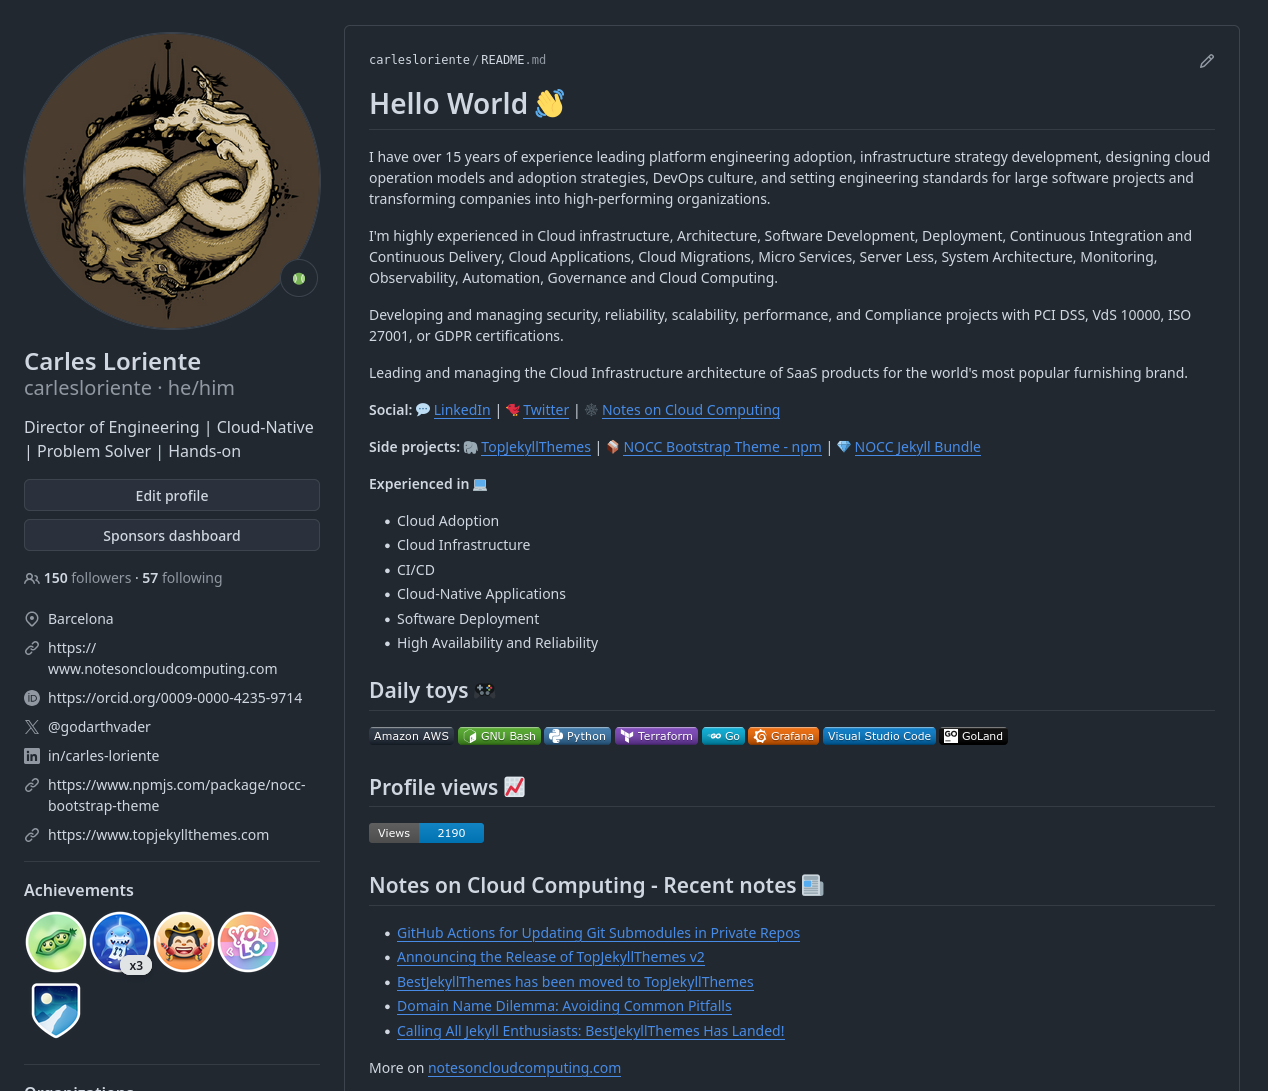
<p><img src="/assets/images/2025-01-26-make-a-dynamic-github-profile-with-github-actions-1.png" alt="GitHub Profile with dynamic content" class="img-fluid" /></p>

<h2 id="github-profile-readme">GitHub Profile README</h2>

<p>To get started, we need a GitHub repository with the same name as your GitHub username. The GitHub profile is a special repository that allows you to showcase your skills, projects, and contributions. By creating a custom README file. You can add content to your profile page, such as an introduction, links to your social media profiles, and a list of your projects.</p>

<h3 id="create-a-new-repository-if-you-dont-have-one">Create a new repository if you don’t have one</h3>

<ol>
  <li>Go to <a href="https://github.com" target="_blank">GitHub</a> and click the <strong>+</strong> icon in the top right corner and select <strong>New repository</strong>.</li>
  <li>Enter the repository name <code class="language-plaintext highlighter-rouge">carlesloriente/carlesloriente</code> (replace <code class="language-plaintext highlighter-rouge">carlesloriente</code> with your GitHub username).</li>
  <li>Select <strong>Public</strong> as the visibility option and check the box <strong>Initialize this repository with a README</strong>. Click <strong>Create repository</strong>.</li>
  <li>Clone the repository to your local machine and create a new branch named <code class="language-plaintext highlighter-rouge">main</code> and push it to the remote repository:</li>
</ol>
<div class="language-bash highlighter-rouge"><pre class="highlight "><button type="button" class="btn-clipboard float-end tooltip" aria-label="Copy to clipboard" data-bs-original-title="Copy to clipboard"><span class="tooltiptext">Copy to clipboard</span><span class="clipboard filter-white"></span></button>
<code>git clone git@github.com:carlesloriente/carlesloriente
cd carlesloriente
git checkout -b main
git push origin main</code>
</pre></div>

<h3 id="create-a-github-profile-readme">Create a GitHub profile README</h3>

<p>You can use markdown syntax in the README file that will be displayed on your profile page.</p>

<p>Edit the <code class="language-plaintext highlighter-rouge">README.md</code> file and add the following content:</p>
<div class="language-markdown highlighter-rouge"><pre class="highlight "><button type="button" class="btn-clipboard float-end tooltip" aria-label="Copy to clipboard" data-bs-original-title="Copy to clipboard"><span class="tooltiptext">Copy to clipboard</span><span class="clipboard filter-white"></span></button>
<code>## Check my latest articles 👋

&lt;!-- BLOG-POST-LIST:START --&gt;
&lt;!-- BLOG-POST-LIST:END --&gt;</code>
</pre></div>

<blockquote class="alert alert-info">
  <p><strong>ⓘ</strong> This includes a heading and a placeholder to put the articles from your blog.</p>
</blockquote>

<p>Save the file and commit the changes to the repository.</p>
<div class="language-bash highlighter-rouge"><pre class="highlight "><button type="button" class="btn-clipboard float-end tooltip" aria-label="Copy to clipboard" data-bs-original-title="Copy to clipboard"><span class="tooltiptext">Copy to clipboard</span><span class="clipboard filter-white"></span></button>
<code>git add README.md
git commit -m 'Add README.md'
git push origin main</code>
</pre></div>

<p>Go to your GitHub profile page and you will see the README file displayed.</p>

<h3 id="update-file-content-automatically">Update file content automatically</h3>

<p>Let’s set a GitHub Action workflow that runs on a schedule. This workflow will fetch data from our personal blog and update the README file with the latest posts.</p>

<p><strong>1.-</strong> Make a new folder named <code class="language-plaintext highlighter-rouge">.github/workflows</code> in the root of your repository.</p>
<div class="language-bash highlighter-rouge"><pre class="highlight "><button type="button" class="btn-clipboard float-end tooltip" aria-label="Copy to clipboard" data-bs-original-title="Copy to clipboard"><span class="tooltiptext">Copy to clipboard</span><span class="clipboard filter-white"></span></button>
<code>mkdir -p .github/workflows</code>
</pre></div>

<p><strong>2.-</strong> Create a new file named <code class="language-plaintext highlighter-rouge">update-readme.yml</code> in the <code class="language-plaintext highlighter-rouge">.github/workflows</code> folder.</p>
<div class="language-bash highlighter-rouge"><pre class="highlight "><button type="button" class="btn-clipboard float-end tooltip" aria-label="Copy to clipboard" data-bs-original-title="Copy to clipboard"><span class="tooltiptext">Copy to clipboard</span><span class="clipboard filter-white"></span></button>
<code>touch .github/workflows/update-readme.yml</code>
</pre></div>

<p><strong>3.-</strong> Add the following content to the <code class="language-plaintext highlighter-rouge">update-readme.yml</code> file:</p>
<div class="language-yaml highlighter-rouge"><pre class="highlight "><button type="button" class="btn-clipboard float-end tooltip" aria-label="Copy to clipboard" data-bs-original-title="Copy to clipboard"><span class="tooltiptext">Copy to clipboard</span><span class="clipboard filter-white"></span></button>
<code>name: Update README
on:
  schedule:
    - cron: "0 * * * *"
  workflow_dispatch: # Run workflow manually (without waiting for the cron to be called), through the GitHub Actions Workflow page directly
permissions:
  contents: write

jobs:
  update-readme-with-blog:
    name: Update README with latest blog posts
    runs-on: ubuntu-24.04
    steps:
      - name: Checkout
        uses: actions/checkout@v4
      - name: Pull in notesoncloudcomputing.com posts
        uses: gautamkrishnar/blog-post-workflow@v1
        with:
          feed_list: "https://www.notesoncloudcomputing.com/feed.xml"</code>
</pre></div>

<p>The <a href="https://github.com/marketplace/actions/blog-post-workflow">gautamkrishnar/blog-post-workflow</a> action created by <a href="https://github.com/gautamkrishnar">Gautam krishna</a> fetches the latest blog posts from a feed URL and updates the file with post titles and links.</p>

<blockquote class="alert alert-danger">
  <p><strong>⚠</strong> Remember to replace the <em>feed_list</em> value with the URL of your blog feed.</p>
</blockquote>

<p><strong>4.-</strong> Commit the changes:</p>
<div class="language-bash highlighter-rouge"><pre class="highlight "><button type="button" class="btn-clipboard float-end tooltip" aria-label="Copy to clipboard" data-bs-original-title="Copy to clipboard"><span class="tooltiptext">Copy to clipboard</span><span class="clipboard filter-white"></span></button>
<code>git add .github/workflows/update-readme.yml
git commit -m "Add update-readme.yml"
git push origin main</code>
</pre></div>

<h4 class="no_toc" id="configure-github-actions-permissions">Configure GitHub Actions permissions</h4>

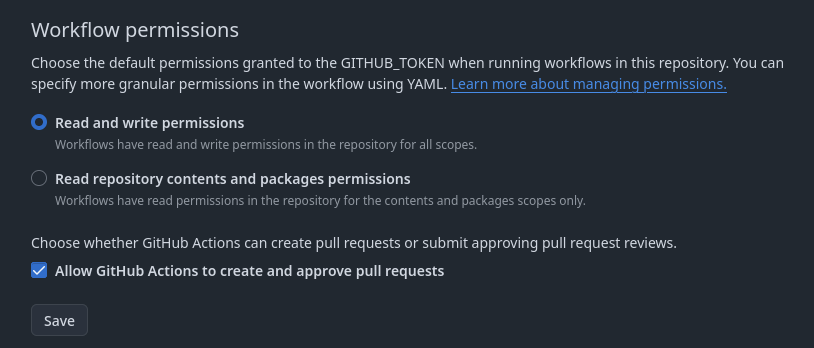
<p>Go to repository settings, Click on <code class="language-plaintext highlighter-rouge">Actions-&gt; General</code> and enable the following permissions:</p>

<ul>
  <li>Click the checkbox “Read and write permissions” button.</li>
  <li>Click the checkbox “Allow Github Actions to create and approve pull requests”.</li>
</ul>

<p>And click on the “Save changes” button.</p>

<p><img src="/assets/images/2025-01-26-make-a-dynamic-github-profile-with-github-actions-2-permissions.png" alt="Repository permissions" class="img-fluid" /></p>

<h3 id="workflow-explanation">Workflow explanation</h3>

<ul>
  <li>The workflow is triggered every hour using the cron syntax <code class="language-plaintext highlighter-rouge">0 * * * *</code>, and also includes a manual trigger using <code class="language-plaintext highlighter-rouge">workflow_dispatch</code>.</li>
  <li>The <code class="language-plaintext highlighter-rouge">actions/checkout@v4</code> action is used to check out the repository.</li>
  <li>The <code class="language-plaintext highlighter-rouge">gautamkrishnar/blog-post-workflow@v1</code> action is used to fetch the information.</li>
  <li>The <code class="language-plaintext highlighter-rouge">feed_list</code> specifies the URL of the feed.</li>
  <li>The <code class="language-plaintext highlighter-rouge">permissions</code> section grants write access to the contents of the repository.</li>
</ul>

<h3 id="testing-the-workflow">Testing the workflow</h3>

<p>Go to the Actions tab of your repository and you will see the workflow <code class="language-plaintext highlighter-rouge">Update README</code> running, or you can trigger it manually by clicking the <code class="language-plaintext highlighter-rouge">Run workflow</code> button.</p>

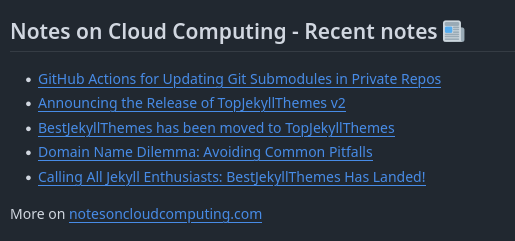
<p>After the workflow finishes, go to the main branch of your repository and you the README file will be updated with the latest blog posts list.</p>

<p><img src="/assets/images/2025-01-26-make-a-dynamic-github-profile-with-github-actions-3-readme-updated.png" alt="Updated README file" class="img-fluid" /></p>

<h2 id="bonus-github-stats">Bonus: GitHub Stats</h2>

<p>You can also add your GitHub stats to your profile README. This includes your GitHub activity, top languages, and more. The <a href="https://github-readme-stats.vercel.app/" target="_blank">anuraghazra/github-readme-stats</a> action created by <a href="https://github.com/anuraghazra">Anurag Hazra</a> fetches the data from the GitHub API and generates a dynamic image that you can include in your README file.</p>

<p><img src="/assets/images/2025-01-26-make-a-dynamic-github-profile-with-github-actions-4-stats.png" alt="GitHub stats" class="img-fluid" /></p>

<h3 id="add-github-stats-to-your-profile">Add GitHub Stats to your profile</h3>

<p>Edit the <code class="language-plaintext highlighter-rouge">README.md</code> file and add the following content:</p>
<div class="language-markdown highlighter-rouge"><pre class="highlight "><button type="button" class="btn-clipboard float-end tooltip" aria-label="Copy to clipboard" data-bs-original-title="Copy to clipboard"><span class="tooltiptext">Copy to clipboard</span><span class="clipboard filter-white"></span></button>
<code>## GitHub Stats
&#91;!&#91;My Stats&#93;&#40;https://github-readme-stats.vercel.app/api?username=myusername&#41;&#93;&#40;https://github.com/anuraghazra/github-readme-stats&#41;</code>
</pre></div>

<blockquote class="alert alert-info">
  <p><strong>ⓘ</strong> Replace <em>myusername</em> with your GitHub username.</p>
</blockquote>

<p>Save and commit the changes to the repository.</p>
<div class="language-bash highlighter-rouge"><pre class="highlight "><button type="button" class="btn-clipboard float-end tooltip" aria-label="Copy to clipboard" data-bs-original-title="Copy to clipboard"><span class="tooltiptext">Copy to clipboard</span><span class="clipboard filter-white"></span></button>
<code>git add README.md
git commit -m 'Add GitHub stats'
git push origin main</code>
</pre></div>

<p>Now, your GitHub profile page will show the GitHub stats.</p>

<h2 id="conclusion">Conclusion</h2>

<p>Enhancing your GitHub profile with dynamic updates brings several advantages. It showcases your latest contributions, projects, or blog posts, making your profile more engaging and informative. By automating the update process, you save time and effort, ensuring that your profile is always up-to-date.</p>

<p>If you found this valuable, consider starring the project’s consider starring the project’s <a href="https://github.com/carlesloriente/carlesloriente">GitHub repository</a> 🌟. Share this knowledge with your network by spreading the word about this post! 🌍</p>

<p>Thanks for reading! 🚀</p>

<h3 id="whats-next">What’s Next?</h3>

<ul>
  <li>Customize your GitHub profile with additional features and integrations.</li>
  <li>Explore other GitHub Actions workflows to automate different tasks.</li>
  <li>Share your GitHub profile with the community and receive feedback.</li>
  <li>Stay updated with the latest GitHub Actions updates and best practices.</li>
</ul>

<h2 id="additional-resources">Additional Resources</h2>

<ul>
  <li><a href="https://docs.github.com/en/github/setting-up-and-managing-your-github-profile/managing-your-profile-readme">GitHub Profile README Documentation</a></li>
  <li><a href="https://docs.github.com/en/actions">GitHub Actions Documentation</a></li>
</ul>]]></content><author><name>Carles Loriente</name></author><category term="github-profile" /><category term="github-actions" /><category term="automation" /><category term="profile" /><category term="github-stats" /><category term="github-profile" /><category term="github-actions" /><category term="automation" /><category term="profile" /><category term="github-stats" /><summary type="html"><![CDATA[Level up your GitHub presence with automated profile updates! In this article, we'll explore how to use GitHub Actions to dynamically display your latest contributions, project statistics, and more..]]></summary></entry><entry><title type="html">GitHub Actions for Updating Git Submodules in Private Repos</title><link href="https://www.notesoncloudcomputing.com/posts/2025-01-25-synchronizing-git-private-projects-with-public-repositories/" rel="alternate" type="text/html" title="GitHub Actions for Updating Git Submodules in Private Repos" /><published>2025-01-24T23:23:02+01:00</published><updated>2026-03-15T00:05:59+01:00</updated><id>https://www.notesoncloudcomputing.com/posts/synchronizing-git-private-projects-with-public-repositories</id><content type="html" xml:base="https://www.notesoncloudcomputing.com/posts/2025-01-25-synchronizing-git-private-projects-with-public-repositories/"><![CDATA[<h2 id="synchronizing-private-projects-with-public-repos">Synchronizing Private Projects with Public Repos</h2>

<h3 id="introduction">Introduction</h3>

<p>Git submodules allow you to integrate code from a separate Git repository (in this case, a public repository) into your main project (a private repository). This is valuable for managing reusable components or external libraries. However, keeping these submodules up-to-date can be challenging.</p>

<p>In this post I will guide you through updating a submodule within a private repository whenever the corresponding public repository is updated.
We’ll leverage GitHub Actions workflows and explore the necessary configurations in both repositories, including the use of secrets for secure authentication.</p>

<p><strong>Key aspects covered</strong>:</p>

<ul>
  <li>Setting up a public repository on GitHub.</li>
  <li>Creating a private repository with a submodule pointing to the public repository.</li>
  <li>Configuring a GitHub Actions workflow in the private repository to trigger on pushes to the public repository.</li>
  <li>Implementing the submodule update logic within the workflow using Git commands.</li>
  <li>Defining and utilizing necessary secrets in both repositories for secure access and authentication.</li>
</ul>

<h2 id="lets-get-started">Let’s get started</h2>

<h3 id="public-repository-setup">Public repository setup</h3>

<p>Create your public repo, in this guide i created my-public-repo at github.com, you can check it out <a href="https://github.com/carlesloriente/my-public-repo">here</a>.</p>

<p>Clone it to your local machine:</p>
<div class="language-bash highlighter-rouge"><pre class="highlight "><button type="button" class="btn-clipboard float-end tooltip" aria-label="Copy to clipboard" data-bs-original-title="Copy to clipboard"><span class="tooltiptext">Copy to clipboard</span><span class="clipboard filter-white"></span></button>
<code>git clone git@github.com:carlesloriente/my-public-repo.git</code>
</pre></div>

<p>Create the folder <code class="language-plaintext highlighter-rouge">files</code> and create a new file <code class="language-plaintext highlighter-rouge">file.txt</code> and do your first commit:</p>
<div class="language-bash highlighter-rouge"><pre class="highlight "><button type="button" class="btn-clipboard float-end tooltip" aria-label="Copy to clipboard" data-bs-original-title="Copy to clipboard"><span class="tooltiptext">Copy to clipboard</span><span class="clipboard filter-white"></span></button>
<code>git checkout -b main
mkdir files
touch files/file.txt
git add .
git commit -m "Add file.txt"
git push -u origin main</code>
</pre></div>

<h4 class="no_toc" id="action-sending-repository-event">Action sending repository event</h4>

<p>Back to your local machine, go to <code class="language-plaintext highlighter-rouge">my-public-repo</code> and create the github workflows folder:</p>
<div class="language-bash highlighter-rouge"><pre class="highlight "><button type="button" class="btn-clipboard float-end tooltip" aria-label="Copy to clipboard" data-bs-original-title="Copy to clipboard"><span class="tooltiptext">Copy to clipboard</span><span class="clipboard filter-white"></span></button>
<code>mkdir -p .github/workflows</code>
</pre></div>

<p>To send and receive events from one repo to another, we are going to use the action <code class="language-plaintext highlighter-rouge">repository-dispatch</code> by <a href="https://github.com/peter-evans">Peter Evans</a>, create the workflow file <code class="language-plaintext highlighter-rouge">.github/workflows/updates_dispatch.yml</code>, with the following content (replace <code class="language-plaintext highlighter-rouge">carlesloriente/my-private-repo</code> with your private repo):</p>
<div class="language-yaml highlighter-rouge"><pre class="highlight "><button type="button" class="btn-clipboard float-end tooltip" aria-label="Copy to clipboard" data-bs-original-title="Copy to clipboard"><span class="tooltiptext">Copy to clipboard</span><span class="clipboard filter-white"></span></button>
<code>name: Dispatch Updates
on:
  push:
    branches:
      - main
jobs:
  dispatch:
    runs-on: ubuntu-24.04
    steps:
      - uses: peter-evans/repository-dispatch@v3
        with:
          token: $&#123;&#123; secrets.PAT &#125;&#125;
          repository: carlesloriente/my-private-repo
          event-type: updating</code>
</pre></div>

<p>Commit the changes:</p>
<div class="language-bash highlighter-rouge"><pre class="highlight "><button type="button" class="btn-clipboard float-end tooltip" aria-label="Copy to clipboard" data-bs-original-title="Copy to clipboard"><span class="tooltiptext">Copy to clipboard</span><span class="clipboard filter-white"></span></button>
<code>git add .github/workflows/updates_dispatch.yml
git commit -m "[skip actions] Add updates_dispatch.yml"
git push origin main</code>
</pre></div>

<blockquote class="alert alert-info">
  <p><strong>ⓘ</strong> The <em>[skip actions]</em> in the commit message is used to avoid triggering the workflow when pushing changes to the public repository.</p>
</blockquote>

<p>Now, go to your public repo at github.com and click the Actions tab, you will see the new workflow <code class="language-plaintext highlighter-rouge">Dispatch Updates</code>.</p>

<h5 class="no_toc" id="updates_dispatch-action-explanation">Updates_dispatch action explanation</h5>

<p>The workflow is triggered by a push event specifically to the main branch of the current repository (my-public-repo).</p>

<ul>
  <li>Job named “dispatch” is executed.</li>
  <li>Steps
    <ul>
      <li>Dispatch Update Event:
        <ul>
          <li>The peter-evans/repository-dispatch@v3 action is used to dispatch a custom event.</li>
          <li>The token input utilizes the secrets.PAT repository secret for authentication.</li>
          <li>The repository input specifies the target repository for the dispatched event (carlesloriente/my-private-repo).</li>
          <li>The event-type input defines the name of the custom event as “updating”.</li>
        </ul>
      </li>
    </ul>
  </li>
</ul>

<p><strong>Key Considerations</strong>:</p>

<ul>
  <li>This workflow relies on the secrets.PAT repository secret for authentication.</li>
  <li>The target repository for the dispatched event (carlesloriente/my-private-repo) needs to be configured appropriately.</li>
  <li>The event-type (“updating”) can be customized to any desired value.</li>
</ul>

<h3 id="private-repository-setup">Private repository setup</h3>

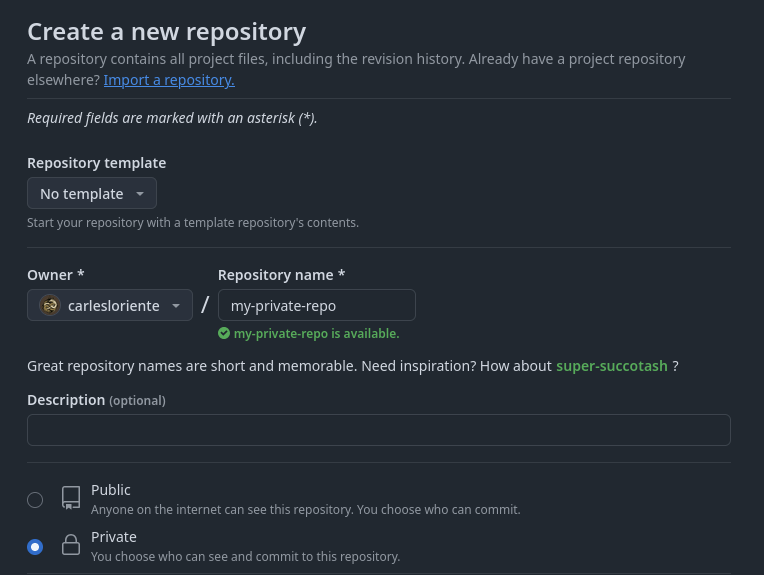
<p>Create the private repo, I created my-private-repo at github.com, you can check it out <a href="https://github.com/carlesloriente/my-private-repo">here</a>.</p>

<p class="text-center"><img src="/assets/images/2025-01-25-synchronizing-git-private-projects-with-public-repositories-1.png" alt="Private Repository" class="img-fluid" /></p>

<p>Now, clone the my-private-repo to your local machine (replace <code class="language-plaintext highlighter-rouge">carlesloriente</code> with your username):</p>
<div class="language-bash highlighter-rouge"><pre class="highlight "><button type="button" class="btn-clipboard float-end tooltip" aria-label="Copy to clipboard" data-bs-original-title="Copy to clipboard"><span class="tooltiptext">Copy to clipboard</span><span class="clipboard filter-white"></span></button>
<code>git clone git@github.com:carlesloriente/my-private-repo</code>
</pre></div>

<p>Create the new branches <code class="language-plaintext highlighter-rouge">main</code> and <code class="language-plaintext highlighter-rouge">develop</code>, and commit the main branch:</p>
<div class="language-bash highlighter-rouge"><pre class="highlight "><button type="button" class="btn-clipboard float-end tooltip" aria-label="Copy to clipboard" data-bs-original-title="Copy to clipboard"><span class="tooltiptext">Copy to clipboard</span><span class="clipboard filter-white"></span></button>
<code>git checkout -b main
touch README.md
git add .
git commit -m 'Initial commit'
git push -u origin main
git checkout -b develop</code>
</pre></div>

<p>Add the <code class="language-plaintext highlighter-rouge">my-public-repo</code> as a submodule to <code class="language-plaintext highlighter-rouge">my-private-repo</code>, create a folder named <code class="language-plaintext highlighter-rouge">submodules</code> and run the following command:</p>
<div class="language-bash highlighter-rouge"><pre class="highlight "><button type="button" class="btn-clipboard float-end tooltip" aria-label="Copy to clipboard" data-bs-original-title="Copy to clipboard"><span class="tooltiptext">Copy to clipboard</span><span class="clipboard filter-white"></span></button>
<code>mkdir submodules
git submodule add git@github.com:carlesloriente/my-public-repo submodules/my-public-repo
git submodule update --init --recursive</code>
</pre></div>

<p>It will add the <code class="language-plaintext highlighter-rouge">my-public-repo</code> as a submodule to the folder <code class="language-plaintext highlighter-rouge">submodules/my-public-repo</code>.</p>

<p>Create a symlink to the folder <code class="language-plaintext highlighter-rouge">files</code> in the root of <code class="language-plaintext highlighter-rouge">my-private-repo</code>:</p>
<div class="language-bash highlighter-rouge"><pre class="highlight "><button type="button" class="btn-clipboard float-end tooltip" aria-label="Copy to clipboard" data-bs-original-title="Copy to clipboard"><span class="tooltiptext">Copy to clipboard</span><span class="clipboard filter-white"></span></button>
<code>ln -ns submodules/my-public-repo/files files</code>
</pre></div>

<p>Commit the changes:</p>
<div class="language-bash highlighter-rouge"><pre class="highlight "><button type="button" class="btn-clipboard float-end tooltip" aria-label="Copy to clipboard" data-bs-original-title="Copy to clipboard"><span class="tooltiptext">Copy to clipboard</span><span class="clipboard filter-white"></span></button>
<code>git add .
git commit -m "Add my-public-repo as a submodule"</code>
</pre></div>

<p>Push the changes to the remote repository:</p>
<div class="language-bash highlighter-rouge"><pre class="highlight "><button type="button" class="btn-clipboard float-end tooltip" aria-label="Copy to clipboard" data-bs-original-title="Copy to clipboard"><span class="tooltiptext">Copy to clipboard</span><span class="clipboard filter-white"></span></button>
<code>git push -u origin develop</code>
</pre></div>

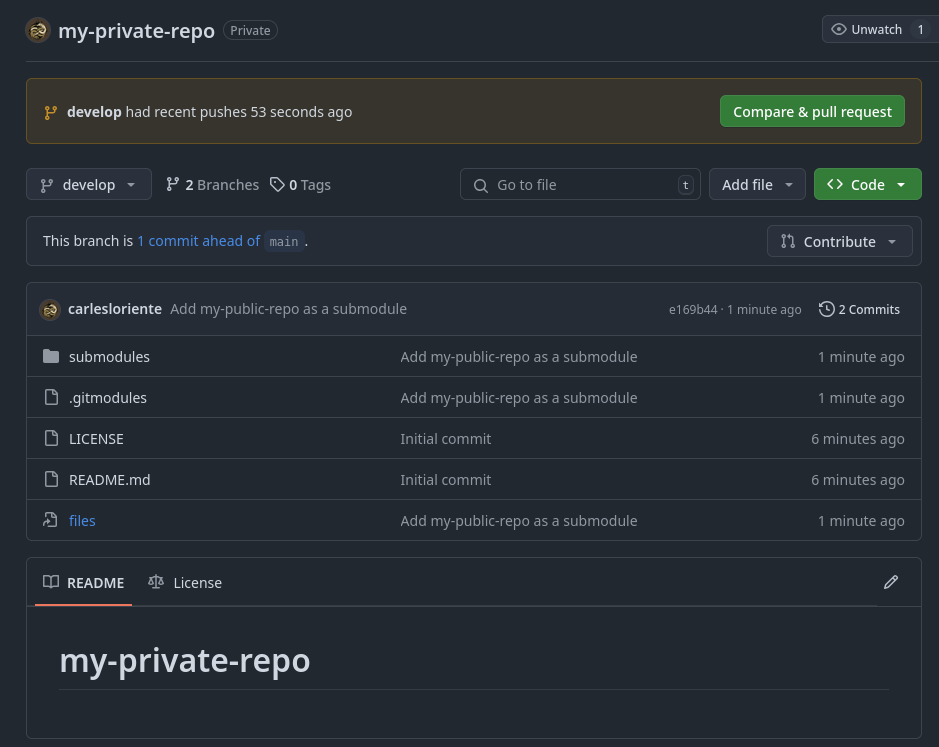
<p>You can check the changes at the branch develop of my-private-repo, you will see the my-public-repo as a submodule.</p>

<!-- Now, go to github.com and create a pull request to merge the branch develop to main. -->

<p class="text-center"><img src="/assets/images/2025-01-25-synchronizing-git-private-projects-with-public-repositories-2.png" alt="Create PR and merge" class="img-fluid" /></p>

<p>After the pull request is merged, go to <a href="https://github.com/settings/personal-access-tokens">Settings-&gt; Personal access tokens</a> and create a new token with the following permissions:</p>

<ul>
  <li>Read access to:
    <ul>
      <li>actions</li>
      <li>metadata</li>
      <li>repo</li>
    </ul>
  </li>
  <li>Read and write access to:
    <ul>
      <li>workflows</li>
      <li>commit statuses</li>
      <li>pull requests</li>
    </ul>
  </li>
</ul>

<p>Copy the token and go to <code class="language-plaintext highlighter-rouge">Settings-&gt; Secrets and Variables-&gt; Actions</code> of <code class="language-plaintext highlighter-rouge">m̀y-private-repo</code> on github.com:</p>

<ul>
  <li>Add a new secret named PAT with the previously copied token value</li>
  <li>Add a new secret named OWNER_EMAIL with your email</li>
</ul>

<p>Now, go to <code class="language-plaintext highlighter-rouge">Settings-&gt; Secrets and Variables-&gt; Actions</code> of <code class="language-plaintext highlighter-rouge">my-public-repo</code> and add the same secrets.</p>

<h4 class="no_toc" id="action-triggered-by-repository-event">Action triggered by repository event</h4>

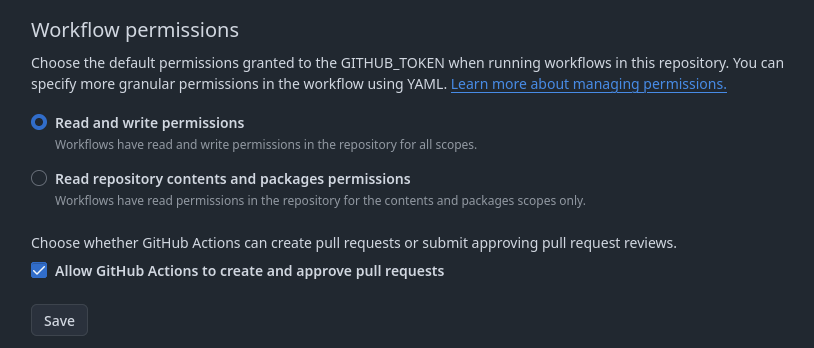
<p>Go to <code class="language-plaintext highlighter-rouge">Settings-&gt; Actions-&gt; General</code> of <code class="language-plaintext highlighter-rouge">my-private-repo</code> on github.com and enable the following permissions:</p>

<ul>
  <li>Click the checkbox “Read and write permissions” button.</li>
  <li>Click the checkbox “Allow Github Actions to create and approve pull requests”.</li>
</ul>

<p><img src="/assets/images/2025-01-25-synchronizing-git-private-projects-with-public-repositories-3.png" alt="Workflow permissions" class="img-fluid" /></p>

<p>Back to your local machine (my-private-repo), create the github workflows folder:</p>
<div class="language-bash highlighter-rouge"><pre class="highlight "><button type="button" class="btn-clipboard float-end tooltip" aria-label="Copy to clipboard" data-bs-original-title="Copy to clipboard"><span class="tooltiptext">Copy to clipboard</span><span class="clipboard filter-white"></span></button>
<code>mkdir -p .github/workflows</code>
</pre></div>

<p>We are going to use the action <a href="https://github.com/actions/checkout">checkout</a> provided by github, so create the workflow file <code class="language-plaintext highlighter-rouge">.github/workflows/update_on_event.yml</code>, with the following content (replace ENV variable; MODULE_PATH with your value):</p>
<div class="language-yaml highlighter-rouge"><pre class="highlight "><button type="button" class="btn-clipboard float-end tooltip" aria-label="Copy to clipboard" data-bs-original-title="Copy to clipboard"><span class="tooltiptext">Copy to clipboard</span><span class="clipboard filter-white"></span></button>
<code>name: Updating Submodule

on:
  repository_dispatch:
    types:
      - updating

jobs:
  update:
    runs-on: ubuntu-24.04
    permissions:
      contents: write
      pull-requests: write
    steps:
      - name: Checkout repository
        uses: actions/checkout@v3
        with:
          token: $&#123;&#123; secrets.PAT &#125;&#125;
          submodules: recursive

      - name: Configure git user
        env:
          OWNER_EMAIL: $&#123;&#123; secrets.OWNER_EMAIL &#125;&#125;
        run: |
          git config --global user.email "$OWNER_EMAIL"
          git config --global user.name "PRBot"

      - name: Generate Unique variable based on timestamp
        run: echo BRANCH=$(date +%s) &gt;&gt; $GITHUB_ENV

      - name: Update submodules
        run: |
          git submodule update --init --recursive --remote

      - name: Commit changes
        run: |
          git add .
          git commit -m "Update submodules"

      - name: Create and push new branch
        run: |
          git checkout -b $&#123;&#123; env.BRANCH &#125;&#125;
          git push origin $&#123;&#123; env.BRANCH &#125;&#125;

      - name: Create pull request
        env:
          GITHUB_TOKEN: $&#123;&#123; secrets.PAT &#125;&#125;
        run: |
          gh pr create -B develop -H $&#123;&#123; env.BRANCH &#125;&#125; --title "PR: Submodule update to develop" --body "Created by Github action"</code>
</pre></div>

<p>Commit the changes:</p>
<div class="language-bash highlighter-rouge"><pre class="highlight "><button type="button" class="btn-clipboard float-end tooltip" aria-label="Copy to clipboard" data-bs-original-title="Copy to clipboard"><span class="tooltiptext">Copy to clipboard</span><span class="clipboard filter-white"></span></button>
<code>git add .github/workflows/update_on_event.yml
git commit -m "Add update_on_event.yml workflow"
git push origin develop</code>
</pre></div>

<p>Go to github.com and create a pull request to merge the branch develop to main. Click the Actions tab, you will see the new workflow <code class="language-plaintext highlighter-rouge">Updating Submodule</code>.</p>

<h5 class="no_toc" id="update_on_event-action-explanation">Update_on_event action explanation</h5>

<p>The workflow is triggered by a custom repository_dispatch event named “updating”. This allows you to manually initiate the update process from within your repository (my-private-repo).</p>

<ul>
  <li>The job named “build” is executed and requires write permissions to both; repository contents and pull requests.</li>
  <li>Steps
    <ul>
      <li>Checkout: actions/checkout@v4 will check out the repository code, including the submodule, using a Personal Access Token (PAT) stored in secrets.PAT repository secret.</li>
      <li>Updates Submodule:
        <ul>
          <li>Navigates to the submodule directory.</li>
          <li>Sets the Git user email to a value retrieved from the secrets.OWNER_EMAIL repository secret.</li>
          <li>Fetches and pulls the latest changes from the submodule’s remote repository.</li>
          <li>Navigates back to the main repository directory.</li>
          <li>Stages the updated submodule.</li>
          <li>Commits the changes with a message indicating the submodule update.</li>
          <li>Pushes the changes creating a new branch.</li>
          <li>Creates a pull request from the new branch to the main branch using the GitHub CLI (gh).</li>
        </ul>
      </li>
    </ul>
  </li>
</ul>

<h3 id="testing-workflows-and-synchronization">Testing Workflows and Synchronization</h3>

<p>Make a change to <code class="language-plaintext highlighter-rouge">my-public-repo</code> and push the changes to the main branch.</p>
<div class="language-bash highlighter-rouge"><pre class="highlight "><button type="button" class="btn-clipboard float-end tooltip" aria-label="Copy to clipboard" data-bs-original-title="Copy to clipboard"><span class="tooltiptext">Copy to clipboard</span><span class="clipboard filter-white"></span></button>
<code>touch files/file2.txt
git add .
git commit -m "Add file2.txt"
git push origin main</code>
</pre></div>

<p>After the push, go to the Actions tab of <code class="language-plaintext highlighter-rouge">my-public-repo</code> and you will see the workflow <code class="language-plaintext highlighter-rouge">Dispatch Updates</code> running.</p>

<p class="text-center"><img src="/assets/images/2025-01-25-synchronizing-git-private-projects-with-public-repositories-4.png" alt="Dispatch updates Github action running" class="img-fluid" /></p>

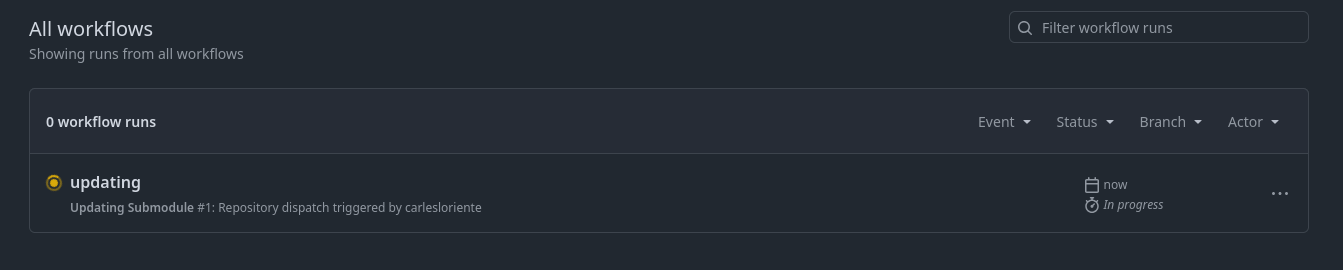
<p>After the workflow finishes, go to the Actions tab of <code class="language-plaintext highlighter-rouge">my-private-repo</code> and you will see the workflow <code class="language-plaintext highlighter-rouge">Updating Submodule</code> running.</p>

<p class="text-center"><img src="/assets/images/2025-01-25-synchronizing-git-private-projects-with-public-repositories-5.png" alt="Updating submodule Github action running" class="img-fluid" /></p>

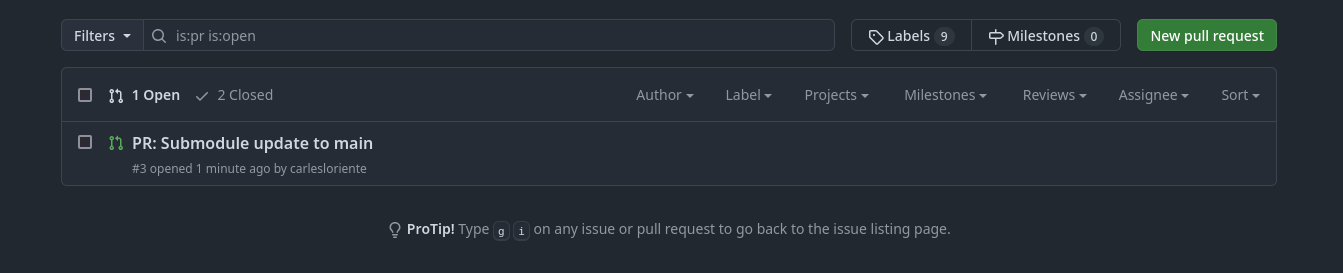
<p>After the workflow finishes, go to the Pull requests tab of <code class="language-plaintext highlighter-rouge">my-private-repo</code> and you will see a new pull request created by the workflow.</p>

<p class="text-center"><img src="/assets/images/2025-01-25-synchronizing-git-private-projects-with-public-repositories-6.png" alt="PR Created by Github action" class="img-fluid" /></p>

<p>When the pull request is merged, the submodule will be updated to the latest commit of the public repository.</p>

<h2 id="conclusion">Conclusion</h2>

<p>GitHub Actions offers a vast array of features and capabilities beyond what we’ve covered here. Dive deeper into the documentation and explore its potential to further automate your workflows.</p>

<p>If you found this valuable, consider starring the project’s consider starring the project’s <a href="https://github.com/carlesloriente/carlesloriente.github.io">GitHub repository</a> 🌟. Share this knowledge with your network by spreading the word about this post! 🌍</p>

<p>Thanks for reading! 🚀</p>

<h3 id="whats-next">What’s Next?</h3>

<ul>
  <li>Explore advanced GitHub Actions features and capabilities to further optimize your workflows.</li>
  <li>Experiment</li>
  <li>Share your feedback and experiences with the GitHub community.</li>
  <li>Stay updated with the latest GitHub Actions updates and best practices.</li>
</ul>

<h2 id="additional-resources">Additional Resources</h2>

<ul>
  <li><a href="https://docs.github.com/en/actions">GitHub Actions Documentation</a></li>
  <li><a href="https://github.com/marketplace?query=ci%2Fcd">GitHub Actions for CI/CD</a></li>
  <li><a href="https://github.com/marketplace?query=git+submodules">GitHub Actions for Git Submodules</a></li>
</ul>]]></content><author><name>Carles Loriente</name></author><category term="git" /><category term="submodule" /><category term="github-actions" /><category term="automation" /><category term="workflow" /><category term="CI/CD" /><category term="git" /><category term="submodule" /><category term="github-actions" /><category term="automation" /><category term="workflow" /><category term="CI/CD" /><summary type="html"><![CDATA[Enhance your development practices by automating git submodule updates using GitHub Actions. This guide provides a step-by-step approach to configuring workflows, managing secrets, and ensuring secure and reliable updates for your private projects.]]></summary></entry><entry><title type="html">Announcing the Release of TopJekyllThemes v2</title><link href="https://www.notesoncloudcomputing.com/posts/2025-01-14-top-jekyll-themes-v2-2-3-released/" rel="alternate" type="text/html" title="Announcing the Release of TopJekyllThemes v2" /><published>2025-01-14T00:34:02+01:00</published><updated>2026-03-15T00:05:59+01:00</updated><id>https://www.notesoncloudcomputing.com/posts/top-jekyll-themes-v2.2.3-released</id><content type="html" xml:base="https://www.notesoncloudcomputing.com/posts/2025-01-14-top-jekyll-themes-v2-2-3-released/"><![CDATA[<p><strong>Say hello to TopJekyllthemes version 2 🎉</strong>:</p>

<p>I’m excited to announce the release of a major update for <a href="https://www.topjekyllthemes.com" target="_blank">TopJekyllThemes</a>! Bringing a significant number of improvements, fixes and a extensive refactoring and rebuilding.</p>

<p class="text-center"><img src="/assets/images/2025-01-13-top-jekyll-themes.webp" alt="TopJekyllThemes site" class="img-fluid" /></p>

<h2 id="key-enhancements">Key Enhancements</h2>

<h3 id="improved-deployment--building">Improved Deployment &amp; Building</h3>

<ul>
  <li>Streamlined build and deploy processes with enhanced efficiency and reliability, including the removal of unnecessary files.</li>
</ul>

<h3 id="enhanced-documentation">Enhanced Documentation</h3>

<ul>
  <li>Standardized theme submission instructions for better clarity.</li>
  <li>Added a prominent License badge for transparency.</li>
  <li>Corrected footer links for improved navigation.</li>
</ul>

<h3 id="fixes">Fixes</h3>

<ul>
  <li>Corrected sitemap pagination URLs.</li>
  <li>Fixed the offline.html page for a more seamless user experience.</li>
  <li>Improved theme search functionality.</li>
  <li>Resolved issues with template page metas.</li>
  <li>Addressed HTML markup errors in submission instructions.</li>
  <li>Corrected CORS cross-origin errors.</li>
  <li>Fixed various JavaScript and CSS errors.</li>
  <li>Standardized screenshot image types.</li>
  <li>Eliminated JavaScript console errors.</li>
  <li>Removed unused code and components for better performance.</li>
  <li>Corrected sitemap.xml template for improved search engine indexing.</li>
  <li>Improved build and deploy action configuration.</li>
  <li>Standardized og:image meta values for enhanced social media sharing.</li>
  <li>Removed inline CSS styles for better maintainability.</li>
</ul>

<h3 id="refactored-file-and-structure">Refactored File and Structure</h3>

<ul>
  <li>Moved count.js to local storage for improved performance and security.</li>
  <li>Implemented a placeholder image for screenshots.</li>
  <li>Removed the debug Nav for a cleaner user interface.</li>
</ul>

<h3 id="enhanced-branding--aesthetics">Enhanced Branding &amp; Aesthetics</h3>

<ul>
  <li>Refined the overall look and feel of the project with a more polished design.</li>
  <li>Improved navigation and CSS styles for a more intuitive user experience.</li>
  <li>Redesigned the themes index page for better presentation and discoverability.</li>
  <li>Updated the offline page with an improved user experience.</li>
  <li>Set default image dimensions for consistency and visual appeal.</li>
  <li>Updated thumbnail image types for higher quality visuals.</li>
  <li>Enabled Disqus comments through the valuable contribution of @carlesloriente.</li>
</ul>

<h3 id="improved-dependencies">Improved Dependencies</h3>

<ul>
  <li>Addressed missing packages in the Build and Deploy action.</li>
  <li>Corrected global installation of NPM packages.</li>
  <li>Enabled harmony packages for broader compatibility.</li>
</ul>

<h3 id="enhanced-security">Enhanced Security</h3>

<ul>
  <li>Thoroughly tested CORS headers to ensure secure data exchange.</li>
</ul>

<p>This release represents a significant step forward for <a href="https://www.topjekyllthemes.com" target="_blank">TopJekyllThemes</a>. We are confident that these improvements will enhance the user experience, improve performance, and strengthen the overall stability of the project.</p>

<p>We encourage you to explore the new version and experience the enhancements firsthand.</p>

<p>her, let’s make <a href="https://www.topjekyllthemes.com/" target="_blank">TopJekyllThemes</a> the ultimate destination for building breathtaking static and dynamic websites with Jekyll! ✨</p>

<h2 id="related-articles">Related articles</h2>

<ul>
  <li><a href="/posts/2025-01-13-best-jekyll-themes-is-now-top-jekyll-themes/">BestJekyllThemes has been moved to TopJekyllThemes</a></li>
  <li><a href="/posts/2024-12-13-best-jekyll-themes/">BestJekyllThemes project launch</a></li>
</ul>]]></content><author><name>Carles Loriente</name></author><category term="jekyll-themes" /><category term="jekyll" /><category term="side-project" /><category term="jekyll-themes" /><category term="jekyll" /><category term="side-project" /><summary type="html"><![CDATA[Discover the latest updates to TopJekyllThemes! This major release includes significant improvements, such as enhanced performance, improved documentation, and a refined user interface. Explore the new features and experience a smoother, more enjoyable user experience.]]></summary></entry><entry><title type="html">BestJekyllThemes has been moved to TopJekyllThemes</title><link href="https://www.notesoncloudcomputing.com/posts/2025-01-13-best-jekyll-themes-is-now-top-jekyll-themes/" rel="alternate" type="text/html" title="BestJekyllThemes has been moved to TopJekyllThemes" /><published>2025-01-13T18:10:02+01:00</published><updated>2026-03-15T00:05:59+01:00</updated><id>https://www.notesoncloudcomputing.com/posts/best-jekyll-themes-is-now-top-jekyll-themes</id><content type="html" xml:base="https://www.notesoncloudcomputing.com/posts/2025-01-13-best-jekyll-themes-is-now-top-jekyll-themes/"><![CDATA[<p>Hey again, fellow Jekyll fans!</p>

<p>Exciting News! I’m happy to announce that BestJekyllThemes has been rebranded and moved to a new domain. Say hello to <a href="https://www.topjekyllthemes.com" target="_blank">TopJekyllThemes</a>, and you can find it at <a href="https://www.topjekyllthemes.com" target="_blank">topjekyllthemes.com</a>. This rebranding reflects the commitment to providing a positive experience for all the users. This change was made to distance ourselves from the previous domain. The domain was registered in the past, and unfortunately, there’s some lingering information and negative reviews associated with. I want to ensure that users have a positive experience and can trust the information provided on the site.</p>

<p class="text-center"><img src="/assets/images/2025-01-13-top-jekyll-themes.webp" alt="TopJekyllThemes site" class="img-fluid" /></p>]]></content><author><name>Carles Loriente</name></author><category term="jekyll-themes" /><category term="jekyll" /><category term="side-project" /><category term="jekyll-themes" /><category term="jekyll" /><category term="side-project" /><summary type="html"><![CDATA[Find BestJekyllThemes.site at the new domain TopJekyllThemes.com! Discover the benefits of this change and explore the exciting features of our updated site.]]></summary></entry><entry><title type="html">Domain Name Dilemma: Avoiding Common Pitfalls</title><link href="https://www.notesoncloudcomputing.com/posts/2025-01-08-choosing-the-right-domain-name/" rel="alternate" type="text/html" title="Domain Name Dilemma: Avoiding Common Pitfalls" /><published>2025-01-07T23:50:02+01:00</published><updated>2026-03-15T00:05:59+01:00</updated><id>https://www.notesoncloudcomputing.com/posts/choosing-the-right-domain-name</id><content type="html" xml:base="https://www.notesoncloudcomputing.com/posts/2025-01-08-choosing-the-right-domain-name/"><![CDATA[<h2 id="choosing-the-right-domain-name">Choosing the Right Domain Name</h2>

<p>So, you’re diving into the web and need a digital home for your project? Choosing the right domain name is like picking the perfect street address – it sets the tone, influences how people find you, and impacts your brand. Let’s break down some common pitfalls to avoid:</p>

<p>First off, <strong><em>research is key</em></strong>. Don’t just grab “yourproject.com” and call it a day. Check if “yourproject.net,” “.org,” or any country-specific versions are already taken. You don’t want to confuse people or accidentally step on someone else’s toes.</p>

<p>Next, <strong><em>keep it simple</em></strong>. Long, complicated names are a nightmare to remember and prone to typos. Imagine trying to explain “[invalid URL removed]” to someone – not fun! Short, catchy names are easier to share and build brand recognition.</p>

<p>Hyphens and numbers? Not your friends. They make your name harder to read, type, and remember. Plus, it adds an extra layer of complexity that can confuse people.</p>

<p>Generic names are a no-go. “MyCloudSolution” or “TheCloudCompany” – yawn! You want a name that stands out and clearly reflects what makes your project unique.</p>

<p>Keywords can be helpful, but don’t go overboard. Including a relevant keyword can boost your search engine visibility, but don’t stuff it in! Focus on a name that’s memorable and easy to understand.</p>

<p>Trademarks are serious business. Make sure your chosen name doesn’t infringe on any existing trademarks. It could lead to legal trouble and damage your reputation.</p>

<p><strong><em>Don’t limit yourself to .com</em></strong>. Explore other TLDs like .net, .org, or even country-specific options. It might open up some great possibilities.</p>

<p>Finally, get some feedback. Have friends or colleagues test your name and see if they can remember it or if they spot any potential typos.</p>

<p>Choosing the right domain name is an important step in your internet journey. By avoiding these common pitfalls and focusing on a clear, concise, and memorable name, you’ll set yourself up for success.</p>]]></content><author><name>Carles Loriente</name></author><category term="domain" /><category term="domain-registration" /><category term="SEO" /><category term="branding" /><category term="online-presence" /><category term="seo" /><category term="branding" /><category term="domain-name" /><summary type="html"><![CDATA[Your domain name is your digital address. This guide helps you choose a name that's not just catchy, but also search engine friendly and aligns with your project goals.]]></summary></entry><entry><title type="html">Calling All Jekyll Enthusiasts: BestJekyllThemes Has Landed!</title><link href="https://www.notesoncloudcomputing.com/posts/2024-12-13-best-jekyll-themes/" rel="alternate" type="text/html" title="Calling All Jekyll Enthusiasts: BestJekyllThemes Has Landed!" /><published>2024-12-13T10:10:02+01:00</published><updated>2026-03-15T00:05:59+01:00</updated><id>https://www.notesoncloudcomputing.com/posts/best-jekyll-themes</id><content type="html" xml:base="https://www.notesoncloudcomputing.com/posts/2024-12-13-best-jekyll-themes/"><![CDATA[<p>Hey there, fellow Jekyll fans!</p>

<p>Do you dream in clean code and crave the simplicity of static websites? Then buckle up, because I’ve got some exciting news for you!</p>

<p>For years, <a href="https://github.com/mattvh/jekyllthemes/" target="_blank">JekyllThemes</a> has been the go-to resource for stunning <a href="https://jekyllrb.com/" target="_blank">Jekyll</a> themes. But sadly, it went a bit quiet.  However, fear not! As a long-time Jekyll user (and huge admirer of <a href="https://github.com/mattvh/" target="_blank">Matt Harzewski’s</a> work!), I couldn’t let this treasure trove fade away.</p>

<blockquote class="alert alert-info">
  <p><strong>ⓘ</strong> This post was edited due to a later change of domain name, in favour of <a href="https://www.topjekyllthemes.com/" target="_blank">TopJekyllThemes</a>. The original domain was <a href="https://www.bestjekyllthemes.site/" target="_blank">BestJekyllThemes</a>.</p>
</blockquote>

<p class="text-center"><img src="/assets/images/2024-12-12-best-jekyll-themes.webp" alt="TopJekyllThemes site" class="img-fluid" /></p>

<p>That’s why I’m thrilled to announce the launch of <a href="https://www.topjekyllthemes.com/" target="_blank"><del>Best</del>TopJekyllThemes</a>, the reborn and revamped directory featuring over 500 of the BEST Jekyll themes, templates, and resources  to supercharge your website building experience!</p>

<blockquote>
  <p><strong><a href="https://www.topjekyllthemes.com/" target="_blank"><del>Best</del>TopJekyllThemes</a></strong>, the best resource to find top-quality Jekyll templates for static and dynamic websites</p>
</blockquote>

<h3 id="building-on-a-legacy">Building on a Legacy</h3>

<p>The amazing work of the previous maintainers is the foundation for <a href="https://www.topjekyllthemes.com/" target="_blank"><del>Best</del>TopJekyllThemes</a>. Now, we’re taking things to the next level with some exciting new goals:</p>

<ul>
  <li>Constant Curation: We’ll be actively seeking out the freshest, most innovative Jekyll themes to keep your website looking ahead of the curve.</li>
  <li>Community Corner: We’re building a vibrant community hub where you can share ideas, get support, and collaborate with fellow Jekyll wizards!</li>
  <li>Contributor Cavalry: We welcome passionate Jekyll enthusiasts to join the cause! If you’ve got a theme or resource to share, we’d love to hear from you!</li>
</ul>

<h3 id="ready-to-dive-in">Ready to Dive In?</h3>

<p>The first iteration of TopJekyllThemes is already live at [shortened URL]. We’d be absolutely ecstatic to hear your feedback on the design and see what you think!</p>

<p>Head over to the official project on GitHub: <a href="https://github.com/carlesloriente/jekyllthemes/" target="_blank"><del>Best</del>TopJekyllThemes</a></p>

<p>Don’t be shy – share your thoughts, suggestions, and contributions! Together, let’s make <a href="https://www.topjekyllthemes.com/" target="_blank">TopJekyllThemes</a> the ultimate destination for building breathtaking static and dynamic websites with Jekyll! ✨</p>

<h2 id="related-articles">Related articles</h2>

<ul>
  <li><a href="/posts/2025-01-13-best-jekyll-themes-is-now-top-jekyll-themes/">BestJekyllThemes has been moved to TopJekyllThemes</a></li>
  <li><a href="/posts/2025-01-08-choosing-the-right-domain-name/">Domain Name Dilemma: Avoiding Common Pitfalls</a></li>
</ul>]]></content><author><name>Carles Loriente</name></author><category term="jekyll-themes" /><category term="jekyll" /><category term="side-project" /><category term="jekyll-themes" /><category term="jekyll" /><category term="side-project" /><summary type="html"><![CDATA[Best Jekyll Themes, the best resource to find top-quality Jekyll templates for static and dynamic websites]]></summary></entry></feed>